
Learn about what is online teaching and how to become an online teacher by using our 9 steps guide even if you’re just starting out.
If you wish to become an online teacher, then there’s no better time than now to become one.
To back this fact, consider this recent study from the Education Department’s National Center for Education Statistics.
It revealed that the number of students taking a portion of their university courses online – increased by 5.7% between the fall of 2016 and 2017.
This shows that the demand for online teachers by college and university students will keep on rising.
Table of contents:
9 Simple Steps To Become An Online Teacher:
What Is Online Teaching?
Online teaching is the form of teaching that is done online. It can be partly done online, in a blended classroom that combines in-person and online instruction.
Or it can be done 100% online, by only interacting with students on the Internet.

Online teaching consists of online teachers and the type of communication tool they use – like an online class or an online course.
Online teachers, also referred to as tutors, distance teachers, remote teachers, or online instructors are teachers who work with students online.
In terms of employment, some of them are employed by big and medium companies as remote teachers.
Which means they get a salary from an employer.
With that goes a commitment to certain hours, job requirements and a ceiling of how much money they can earn.
But most of the online teachers are freelancers.
Meaning they own their own teaching business which gives them freedom, flexibility in hours and many more gain opportunity in terms of money.
For example, according to Forbes, Shane and Jocelyn Sams has become very successful online teachers who made over $45,000 per month in 2016.

If you have teaching experience and are considering to become an online teacher, here’s an in-depth guide on how you can go about this.
9 Steps To Become An Online Teacher:
Step #1: Pick A Subject
The first step you need to take to become an online teacher is deciding the particular subject you’d like to teach.
While you have the freedom to teach anything you want, you likely to find happiness and be more passionate teaching something that interests you.
Reflect on your days at high school and think of a subject that you were very good at. Perhaps it’s a subject that you’re still studying in your part-time.
For some, this could be a language subject like English while for others, it could be math-related or a science topic.
Apart from your passion, you should also consider the likelihood of getting hired to teach that chosen subject.
Math, science, and language arts are all subjects that you can get hired to teach.
However, if you pick a topic that’s very far from the core subjects, you might have a difficult time finding employment or getting clients.
Step #2: Select A Teaching Platform
Thanks to technological advancements, we now have hundreds of platforms where you can share and put your teaching expertise into practice.
Some even allow you to teach for free. Such platforms include:
Weshare.net
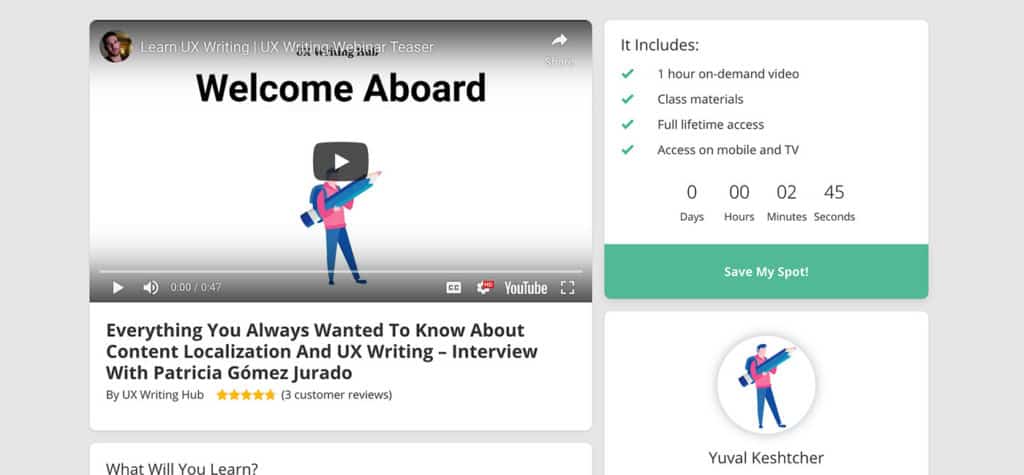
This is one of the most dominant online class platforms. It’s home for thousands of online teachers that generate $1000’s of dollars every month.
One thing you’ll love about teaching on Weshare is that the platform offers an array of resources. They let you design your classes using different media such as video lectures, screencast videos, audio files, documents and PowerPoint files.
This platform is also completely free. Plus, it allows you to offer your course free of charge or charge a fee.
You can use our guide on how to make money using Weshare, in order to have the best path to success.
RCampus
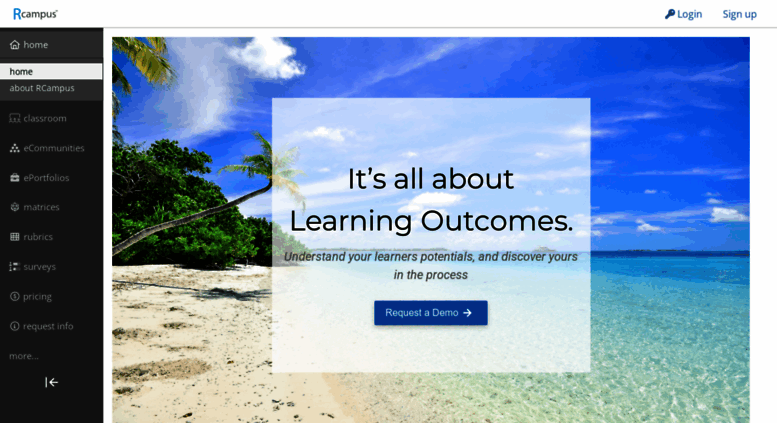
Here’s another website that allows you to create your teaching course and interact with students at no extra cost!
Here, you’ll have access to resources that allow you to develop your class and student assignments, keep track of grades, arrange class discussions and post enlightening content in the form of videos, images or links.
Step #3: Create A Script Or Class Plan
You have vast teaching experience. So as you create your online class, you’re brimming with enthusiasm for your subject.
You can’t wait to share everything you know about the topic with others.
You’re eager to inspire students!
Important to note though is that your red-cheeked enthusiasm can be a massive advantage and a potential drawback.
Your educational content will likely reflect your thrill and excitement.

But, it also makes you susceptible to overwhelming your students with too much.
Since you’re so excited to teach them every nitty-gritty, you may leave your students gasping for air.
This is where a script or class plan comes in handy!
With a class plan or outline, you can divide the class into major sections.
This is where you come up with learning goals for each class.
Each chapter should be followed by a summary or a series of questions and discussions.
Here are a couple of tips to help you when developing your course outline:
- Specify the medium – depending on the teaching platform you choose in step 2, you can share the content in the form of video, PowerPoint slides, walkthrough app or software, written text, worksheets or a combo of all of the above.
- Outline the main talking points – what problem are you trying to solve? Or, what are the main points that you’re trying to get across to your students?
- Organize your ideas – write down all of your ideas and prioritize them by the most important to the least important. Then, choose what will be the exact topic of your first class.
- Title your class – make it catchy and attractive so that your students will be eager to get started.
Step #4: Get Feedback
You’ve devoted days, weeks, perhaps even months into researching, organizing and creating your online course material.
But before you click that submit button to share your content with the world, it helps to get some feedback.
Considering how much time and effort you’ve put into creating your class, the last thing you want is to be unable to attract enough clients because you omitted a crucial detail in your course
Feedback is an integral part of marketing your class online.
Even though a majority of marketing campaigns emphasize on getting new clients.
A smarter move is to ask for feedback from the people around you.
If you’ve created a video, share it with your friends, family or teaching colleagues and ask them to give you honest views and opinions.
Depending on their opinions, you can tweak the video or material before sharing it on the online teaching platform.
Step #5: Invest In The Right Gear
Nowadays, most computers come equipped with a microphone and a camera.
That is pretty much all you’ll need to create your class content.
In the event that your computer doesn’t have these accessories, then you’ll have to invest in one.
If you’re forced to purchase a computer, be sure to store the receipt properly.
This way, once your online business kicks off, you’ll be able to deduct the cost of this equipment when filing taxes.
Consult a tax expert or research and find out whether it’s possible to deduct these expenses from your taxable income.
Apart from a computer, another piece of equipment you’ll need is a video editing software. More often than not, you’ll have to purchase separately as computers don’t come with this program.
If this is your first time producing videos, the field may seem a little intimidating.
But don’t worry, using this program is a breeze.
Disclaimer: You don’t have to purchase any costly software like Adobe Premiere pro or Final Cut pro. We have written about how you can do it for free in our “How to make a video” guide.
Here are the aspects you should focus on when purchasing a video editing software:
- It should have an intuitive user interface – you shouldn’t have to refer to the user guide every time you want to perform an action. Essentially, the program should have intuitive or user-friendly features that make it easier to navigate.
- Offer a free trial– video editing software that allows you to try before you buy is the best. This way, you can determine whether it meets your needs before committing to purchasing it.
- Check the price – at this point, you don’t have to invest in pricey programs. You’re not looking to make Hollywood-quality videos, so software that provides the most basic functions will suffice.
Step #6: Create A Good Video
Videos have become one of the most efficient marketing tools.
Since they’re able to grab people’s attention, many businesses are using videos to advertise their products and provide new information to their customers.
Needless to say, using quality videos in your online class can make your content more engaging and captivating; hence attract more learners.
But how do you ensure that you make a quality video?
Here are a few things you should pay attention to when producing your short video:
Lighting

Lighting can make or break your video!
It’s simple, people prefer watching well-lit videos than ones that are produced in dim-light.
If you’re recording using your computer, consider setting up a few desk lamps behind and around the monitor to improve lighting.
If you have a few bucks to spare, you can even purchase a cheap lighting kit for video production.
Content

Regardless of how flashy your video is, it won’t help you achieve your goal is the content is not relevant or meaningful.
If you’re well-versed with a subject, you may be able to relay your message off the cuff.
If not, we recommend creating a script that you’ll read from.
Reading from a carefully scripted document ensures that you don’t go off-topic.
It also helps to cover all the key points without making the video unnecessarily lengthy.
Audio

The quality of sound is just as important as the quality of lighting.
If you have a good computer, then its integrated microphone should be good enough to record balanced audio.
To avoid audio problems, perform a test before you start recording your main video.
Record a short clip, review the footage and pay attention to the quality of sound.
It should have the right volume and shouldn’t have any interference or distortion.
Disclaimer: When starting with online teaching there’s no need to invest in professional gear.
For a more in-depth overview read our guide about how to make a good looking video and about how to create great content for your video.
Step #7: Set A Price For Your Course
If you’re new to creating online content, setting a price for your class can feel like the most challenging part of the entire process.
Even if you’ve created a quality class, people may have access to this information for free. So why should they pay to read the same content that’s available for free elsewhere?
Well, there are several benefits that your paid class will offer.
For starters, it will have a carefully crafted structure that leads to results.
You’ll also be offering student hands-on support – something that search engines cannot offer.
Also, once a student enrolls for your paid course, they’re held accountable for what they do.
They’ll learn a great deal from your content material, but they’ll also get evaluated through assignments and tests.
Given all these extra resources that you’ll offer through your class, it makes sense to charge a fee for it.
Step #8: Promote Your Class Or Course
Once your videos and class materials are ready, the only thing left is to start the upload, and start learning. But before you start making any profit, you have to do some serious marketing.
You can advertise your content using one or a combination of several strategies.
For instance, you can publish a class promotion video and post it on your social media accounts.
One platform that’s very effective for marketing is YouTube.
With more than 2 Billion people visiting it on a monthly basis, according to Statista.
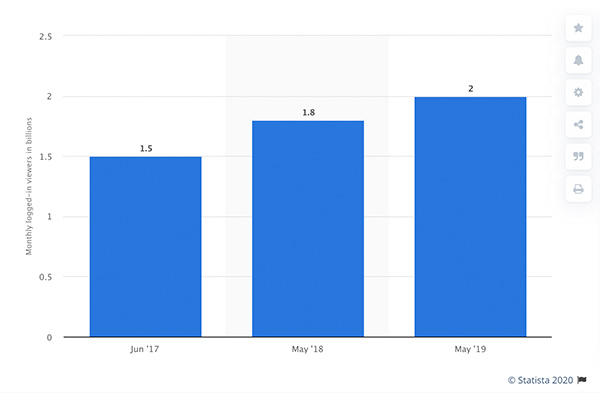
Your class stands a better chance of being discovered if you take advantage of this marketing platform.
Another marketing strategy we recommend entails hosting a live webinar.
This is simply an interactive platform that lets you engage with potential students.
It gives learners a chance to check out your vibe – quality of content, teaching technique, eloquence and more.
Step #9: Make Another One
Even If your online class doesn’t become a hit, there’s no reason why you can’t create another one.
The more classes you invest in, the more chance of success you’ll have.
The best part about this is that you’ll be familiar with all the hurdles you’re likely to encounter and how to overcome them.
By the time you’re developing another class, you’ll also know the best online class platform to use.
Alongside, how to create a class outline and marketing strategies that work.
Wrapping Up
Regardless of the profession, you’re in currently, you have at least one or two things that you can teach the world.
And with the invention of online teaching platforms, this is the best time to share your knowledge online and monetize your business.
But before you dive headfirst into this field, there are several steps you’ll need to take.
In our post, we’ve broken down this process into 9 simple steps.
These include understanding what is online teaching, choosing a topic and a teaching platform, developing a script or course outline, getting feedback and more.
Follow our guide and you’ll be on your way to earning a living from online teaching.
Elad Lev is the founder of Weshare.net – In love with words, videos and everything in between. His passion for helping people in starting a business online and teaching online is avid in every article he makes. In addition to his writing and content publishing.
We Also Reviewed
- 45+ Advertising Statistics That Will Blow Your Mind
- 33 CRM Statistics You Should Know
- 41+ Public Speaking Statistics You Should Know
- 35 Machine Learning Statistics You Should Know
- 34 Employee Burnout Statistics You Should Know
- 39+ Communication Statistics You Need To Know
- 37+ Cold Calling Statistics You Need To Know
- 21+ Entrepreneur Statistics You Should Know
- 35+ Contract Management Statistics You Should Know
- 37+ Zoom Statistics You Should Know
- 35+ Sales Training Statistics You Should Know About
- 75+ WordPress Statistics You Need to Know
- 41+ Startup Statistics You Need to Know
- 37+ Presentation Statistics You Need To Know
- 41+ Recruiting Statistics You Need to Know
- 23+ Apple Podcast Statistics You Should Know About
- 31+ Spotify Podcast Statistics You Should Know About
- 35+ Spotify Statistics You Should Know