
Learn how to share your screen on Discord on both desktops and mobiles, and learn how to share it on different channels.
Discord is a fast, secure, and free voice and text chat app for gamers that works on your desktop and phone. One of the best features of Discord is the ability to share your screen with other people in your chat channel. In this article, we will show you how to share your screen on Discord. We will also discuss some of the benefits of screen sharing on Discord.
It feels really great to go for online streaming, but sometimes you just want to share your screen with someone special. Whether it’s watching TV shows or playing video games together. Don’t worry! Discord has got everything covered! With the Go Live and Screen Share features of the Discord, you can share the screen easily. It lets users do all of the things in one application without ever leaving their server (or client). So, there is no reason why everyone shouldn’t use this amazing software today.
You can easily share the screen using Discord though you’ll need to subscribe and unlock higher qualities with Nitro the default values are more than enough for a smooth screen sharing experience.
There are a few ways to share your screen on Discord. Let’s take a look at them now!
How To Share A Screen On Discord?
What is screen sharing? It’s a way to share your computer’s display with another person. You can use it so that they see exactly what you see, no matter where in the room or building their desk sits! This will allow them to have a greater insight into how things work for everyone on Discord – including yourself since both parties have access at all times during usage.
To share your screen on Discord, follow these simple steps:
Step # 1: Open The Discord App
First, open up the Discord app and sign in to your account. Click on the server that you want to share your screen with. Then, click on the “Go Live” button.
Step # 2: Open The Chat You Want To Share Your Screen With
Next, open up the chat that you want to share your screen with. This can be a public or private chat. You cannot share your screen with individual people in a voice call; it must be a text-based chat.
Step # 3: Click On The “Share Screen” Button
Then, click on the “Share Screen” button and select the screen that you want to share. You can also choose to share your entire desktop or just a specific window.
Step # 4: Click On Start Broadcast
Finally, click on the “Start Broadcast” button to start sharing your screen with the chat. You will see a message that says, “Your stream has started!”

When you are done streaming, just click on the Stop Broadcast button and then confirm by clicking Yes or No in the pop-up window. The other person will receive a message saying, “Your stream has stopped!”
That’s it. You will now be able to share your screen with the people in the chat on Discord easily.
How To Share Screen On Discord Using Mobile?
Discord is a free voice and text chat app that can be used by gamers for chatting during gameplay or other people who want to communicate over the internet. It supports screen sharing and has a customizable interface for mobile devices as well!
Step # 1: Open Your Discord App On Your Device
The first step is to log in to your Discord ID using your mobile phone or any device you want to share the screen from.
Step # 2: Tap On The “Go Live” Button
After logging in tap on the ” Go Live” button at the top of any channel that is visible in the menu bar list (except for the one labeled Settings).
Step # 3: Select The Screen You Want To Share
Next, a screen will pop up asking you to choose whether you want to stream just a game or your full desktop.
Then, choose between “Game” and “Desktop”. If you select Game then tap on “Select an app” from the drop-down menu that appears below it. This will allow us to pick which app we want to share onscreen.
If you select Desktop, then the app will share your entire desktop. After that, just grant Discord access to your microphone and camera if prompted.

Step # 4: Start Streaming By Tapping On “Start Broadcast”
Next, press the “Start Broadcast” button and give it a few seconds to load. Now you’re ready for some serious screen sharing!
Step # 5: Stop The Broadcast By Tapping On “Stop Broadcast”
When you want to stop broadcasting, tap on the “Stop Broadcast” button at the top of any channel that is visible in the menu bar list (except for the one labeled Settings). This will stop the stream from being shared across all channels.
Done! You can now share your screen on Discord from any device that has an internet connection, including mobile phones and tablets!
Let’s move further with some additional information that will further enhance your experience with Discord.
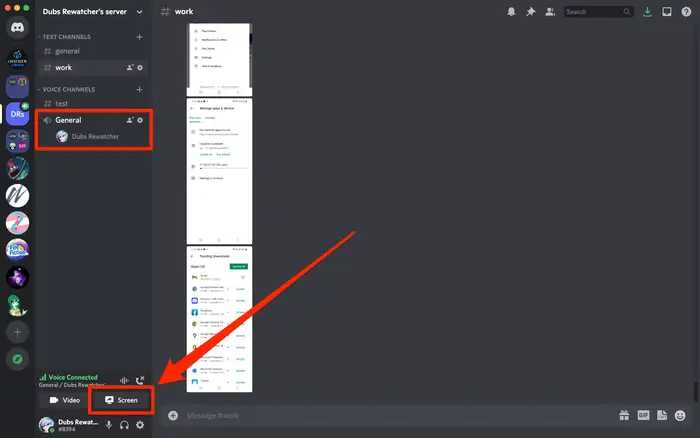
How To Share A Screen In A Voice Channel?
With Discord’s Go Live feature, users are now able to share their screens in private calls. This is a thing of the past because this new update makes it so easy!
Going live is the perfect way to share your screen with everyone in a voice channel. When you go offline, others can still view what’s happening there and hear all of those funny moments!
Following are the steps to be followed in order to cherish these auspicious moments and make it a memorable event:
Step # 1: Launch Discord
Start by launching Discord and joining a voice channel.
Step # 2: Click On The Screen Button
You’ll find the Screen button on your voice status panel, around the bottom left corner of Discord’s window. This is where you can turn off your microphone and headset.
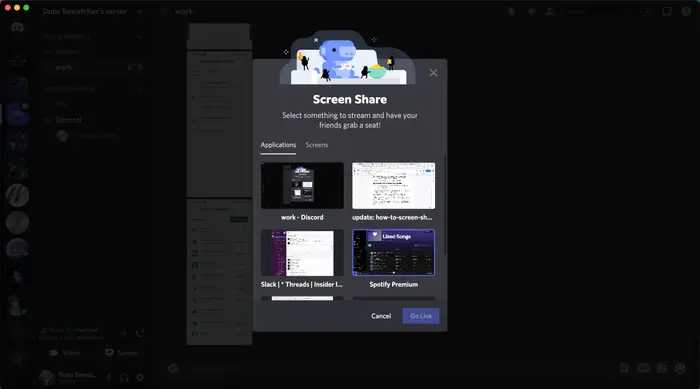
Step # 3: Select The Screen Settings
After clicking the Screen button, you’ll see a pop-up window appear with options to either share your entire display or individual applications like web browsers and games. If it’s anything other than “entire screen” then click on that option before proceeding further. The “Go Live” button will become active once again after you’ve selected an option from the drop-down menu.
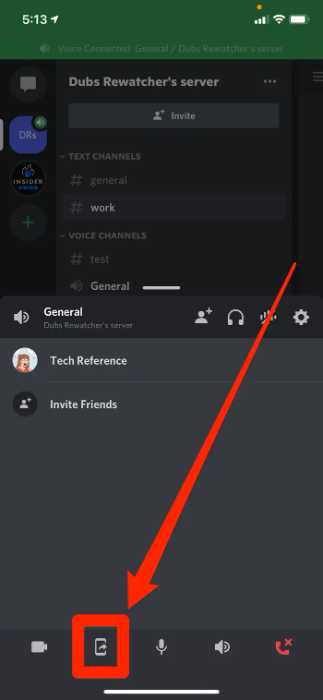
Step # 4: Press The Share Button
Click the Screen button on your voice status panel, just below where it says “DISCORD”. After selecting the quality and settings of the screen, you’ll be able to press the “Share” button at the bottom of the window so that sharing can begin automatically! You should hear an audio confirmation when clicked the button successfully.
The process is quick – after pressing “Share” from this menu or any other option within Discord there will appear one sound effect: The Sync alert which signifies the successful connection between client(s) and server.
The recipients will see a notification in the voice channel once you go live.
Step # 5: Grant Discord Access To Your Microphone And Camera
Next up, turn on your microphone and camera to have fun! Once you have been granted access to Discord to use your microphone and camera, you are also set to share your screen!
Step # 6: Stop Sharing
When you want to stop streaming, the user can click on this button from any channel that is visible in the menu bar list (except for Settings) and then select the “Stop Live Stream” option at the bottom left corner of the screen before returning back home with your friends! It should be noted here that this will not just stop the stream but also end the call.
When you want to watch someone’s live stream, all that is needed is the person streaming their screen and a good internet connection. You just have to simply click on their username in order to join them within a specific chat room where they will be able to grant you full access during broadcasts via this small window at the right side of the page labeled “Live Feed.”
How To Change Settings While Screen Sharing On Discord?
It’s easy to change any of the settings while you’re screen sharing on Discord. All it takes is one click!
Step # 1: Open The Menu
First of all, when you’re sharing your screen, there will be a little pop-up window on Discord. Hover over this and click to open the menu where Stream Settings are highlighted in green at bottom of the page – then select it for more options!
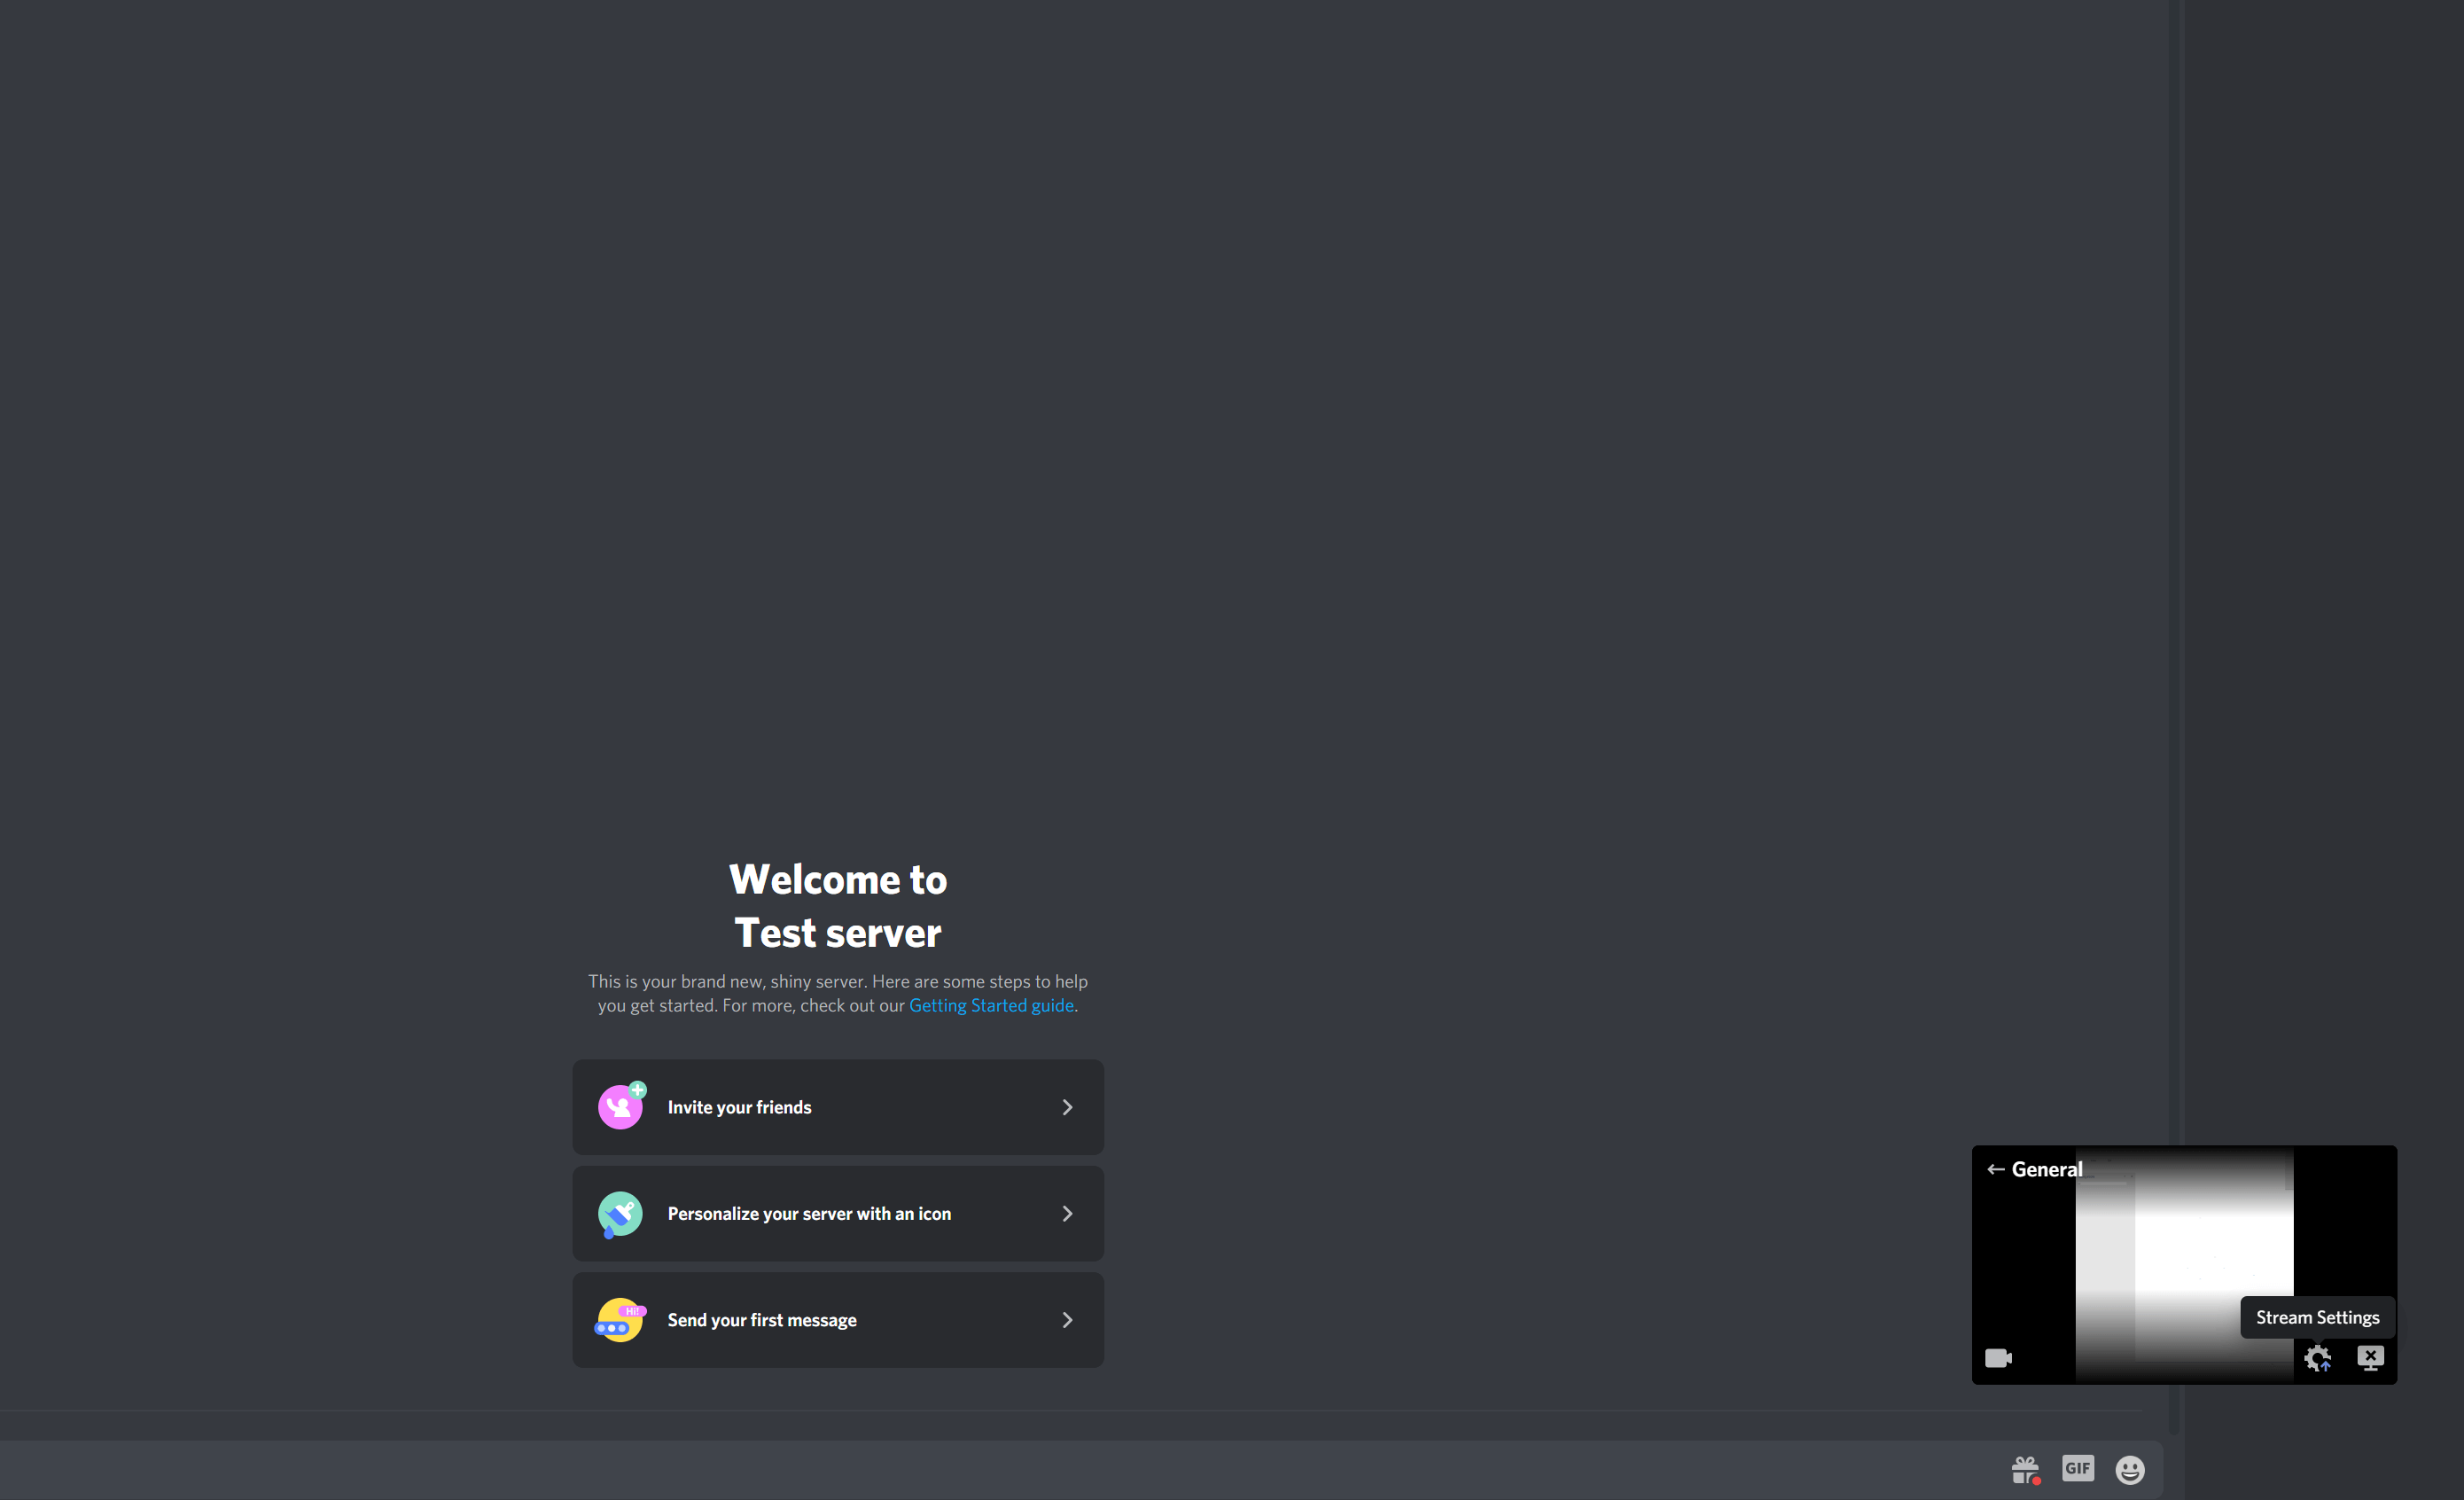
Step # 2: Change The Settings
You can change the stream settings to match your needs from here. Choose whether or not you want a higher frame rate and resolution so that everything looks crystal clear on both sides.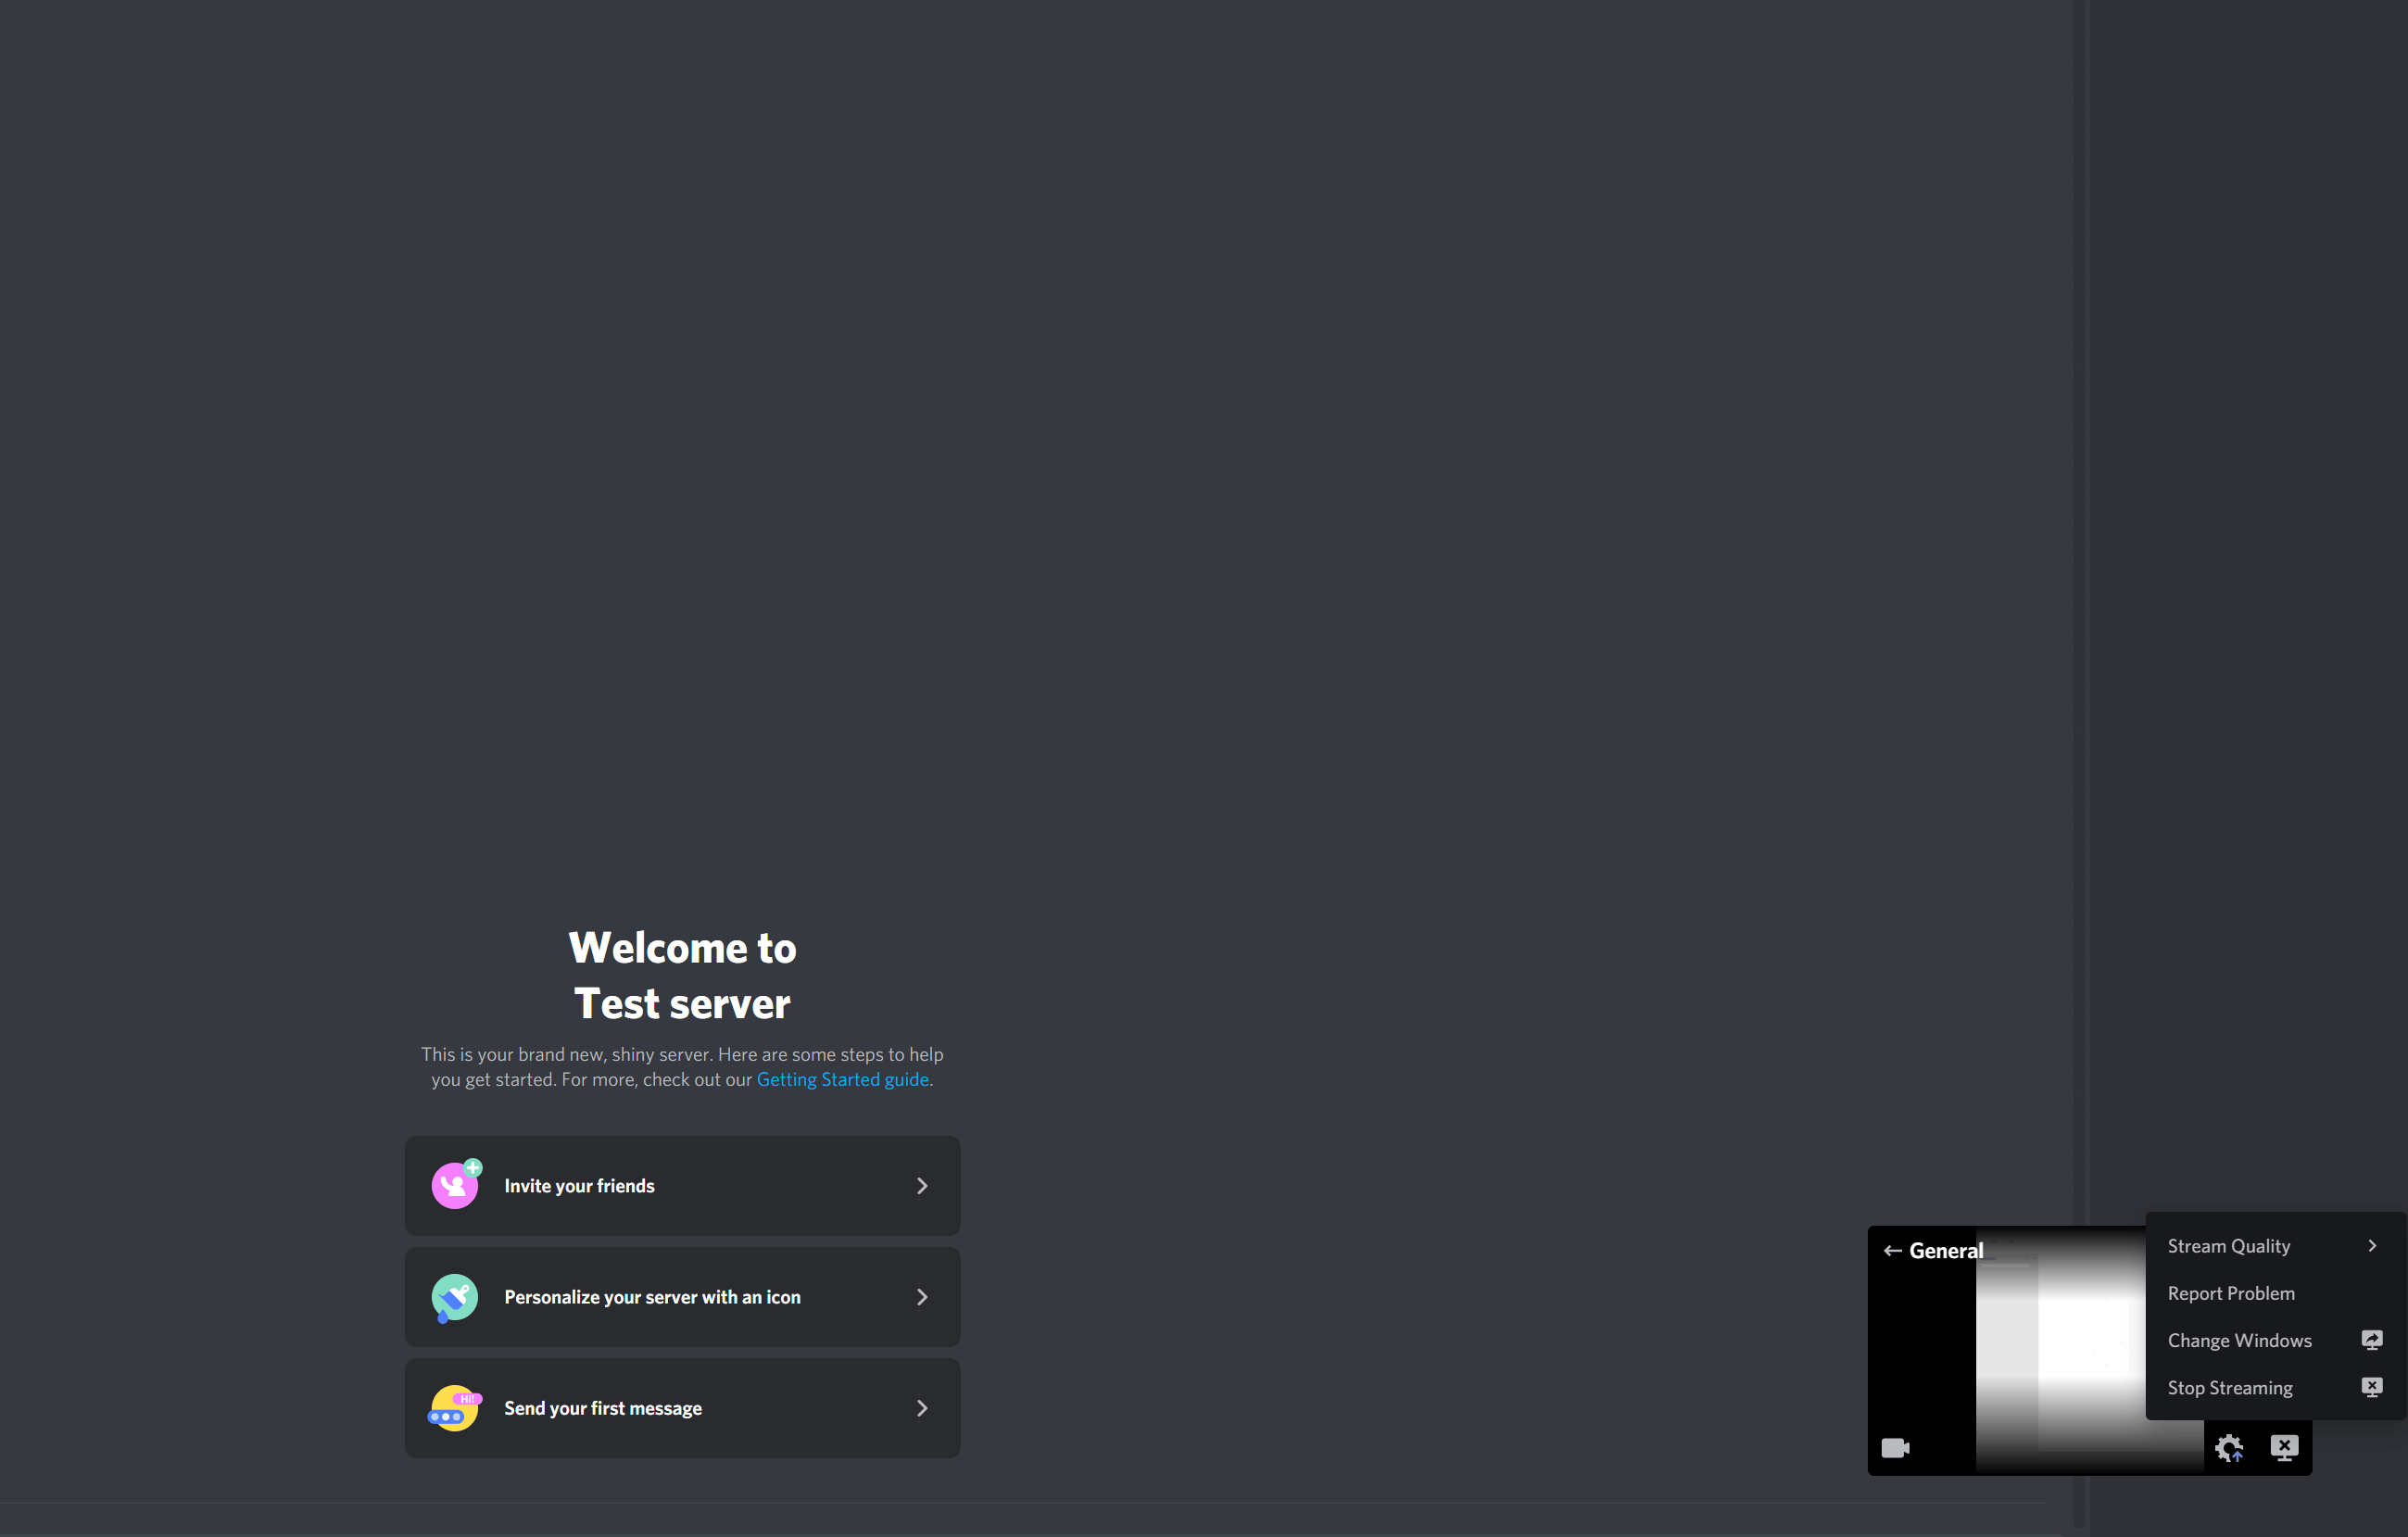
This is a really cool tip that you can use if your stream lags or stutters and the video keeps cutting out. Lowering the resolution will make it easier!
If you want to limit the number of people who can watch your live stream, you also have that option in this menu. You can either choose to restrict it by entering specific usernames or allow anyone on Discord to join in!
If you are having trouble viewing someone’s live stream, make sure that you have enabled pop-ups for Discord in your browser and check to see if they are streaming in HD quality. You should also try using a different browser if the issue persists.
Conclusion
That’s all about screen sharing on Discord! After following these simple steps, you’ll be able to broadcast your screen in no time. Now go have some fun and enjoy sharing those special moments with friends and family!
If you are ever experiencing any problems when attempting to share your screen, be sure to check out our support article on the subject for more information. Hope you enjoyed reading this blog post.
Eisha Gul is a part of Weshare’s writing team. She has social media marketing experience for over 4 years and has been writing in-depth guides and articles about the industry ever since.
We Also Reviewed
- 23+ Apple Podcast Statistics You Should Know About
- 31+ Spotify Podcast Statistics You Should Know About
- 35+ Spotify Statistics You Should Know
- 45+ Advertising Statistics That Will Blow Your Mind
- 33 CRM Statistics You Should Know
- 41+ Public Speaking Statistics You Should Know
- 35 Machine Learning Statistics You Should Know
- 34 Employee Burnout Statistics You Should Know
- 39+ Communication Statistics You Need To Know
- 37+ Cold Calling Statistics You Need To Know
- 21+ Entrepreneur Statistics You Should Know
- 35+ Contract Management Statistics You Should Know
- 37+ Zoom Statistics You Should Know
- 35+ Sales Training Statistics You Should Know About
- 75+ WordPress Statistics You Need to Know
- 41+ Startup Statistics You Need to Know
- 37+ Presentation Statistics You Need To Know
- 41+ Recruiting Statistics You Need to Know