
Learn how to install the video app Zoom on your iPhone or on your iPad to take your meetings with you wherever you go!
Let’s face the hard truth, the work-from-home situation has us all tangled up! Meetings, meetings, and more meetings have us occupied all day. And it’s all happening in the virtual world. So, under these circumstances, we all need apps that can make these virtual meetings happen quickly and without any interruptions. Zoom is one such app that makes it all possible! We all know how app downloading works on Android phones, but today, we are going to talk about downloading apps on iPhone or iPad. In this article, we will take a look at how to download the Zoom app on your iPhone or on your iPad. So, let’s get started!
How To Install Zoom On iPhone Or iPad?
To take your meetings on the go with you, you need to get the Zoom app on your iPhone, or if you are a tab lover, then you need to get the zoom app on your iPad.
There are two ways to install Zoom on your iPhone or iPad. The first way is by downloading the Zoom app from the App Store and the second way is by installing the Zoom app through iTunes.
In this article, we will take a look at both these methods of installation.
How To Download Zoom App From The App Store?
Now, if you are an iPhone user and want to download the Zoom app from App Store, then follow the steps mentioned below.
Step # 1: Open up the App Store
The first thing you need to do is to surf on your iPhone and open up the App Store. If you are not aware of where the App Store is located on your iPhone, then it is at the bottom right corner of your phone and looks like a white A with a blue background. Click on it.
Step # 2: Search for the app
Once you have opened up the App Store, you will see a search bar at the top of your phone. Now, all you need to do is type the name of the app that you want in this search bar and click on ‘Search’. You can search for any app by just typing its name on the search bar.
Step # 3: Search for Zoom
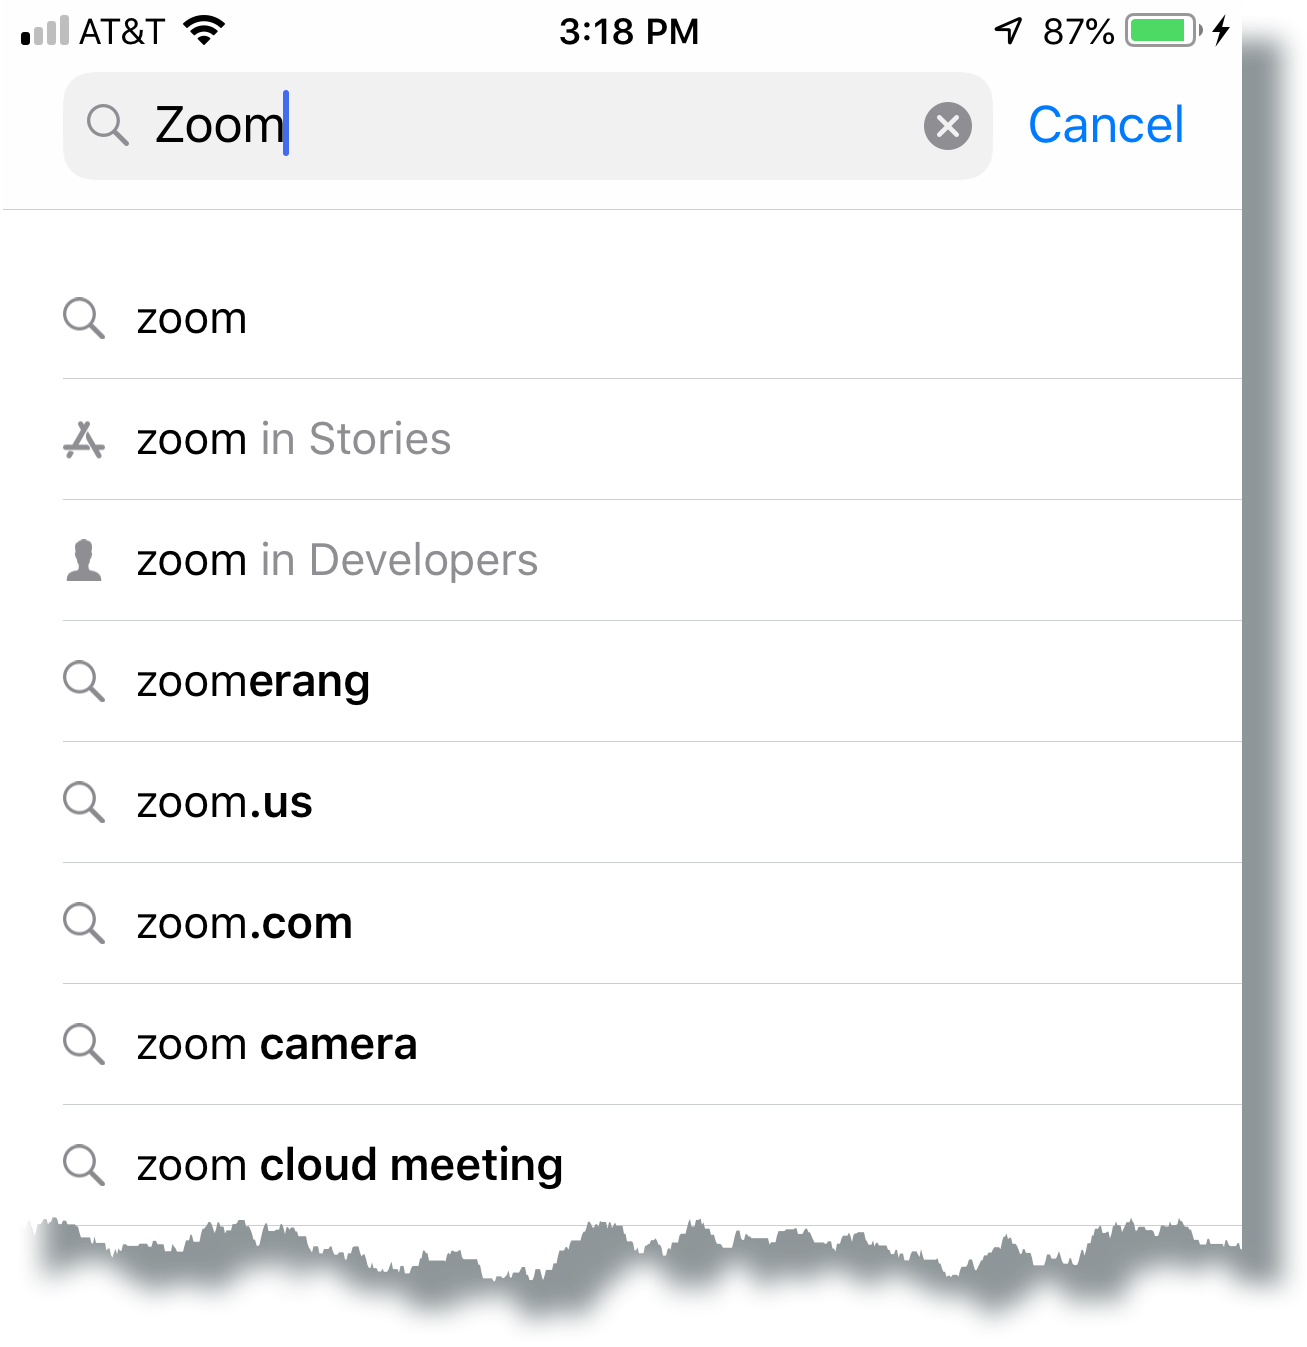
Next up, click on the search bar and type in Zoom. Now, as soon as you type in Zoom, a list of apps will appear on the App Store that have ‘Zoom’ in their names. You will need to navigate through all these apps and select the right one which is explained in the next step.
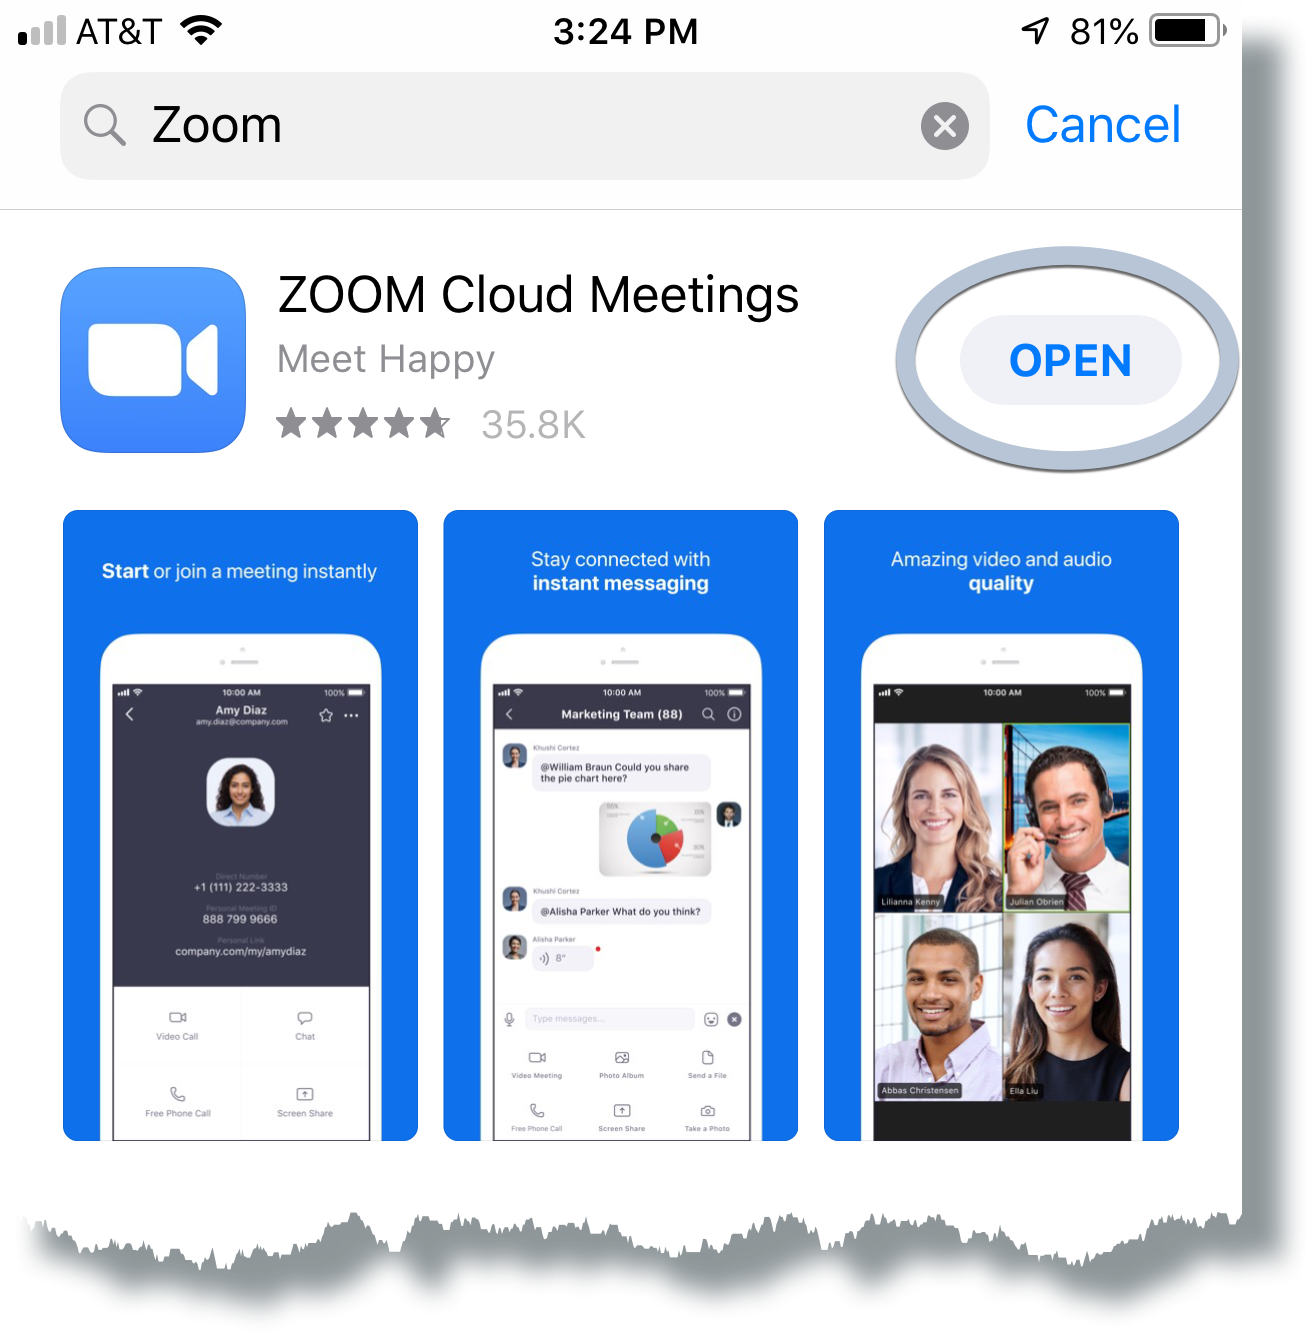
Step # 4: Select Zoom Cloud Meetings
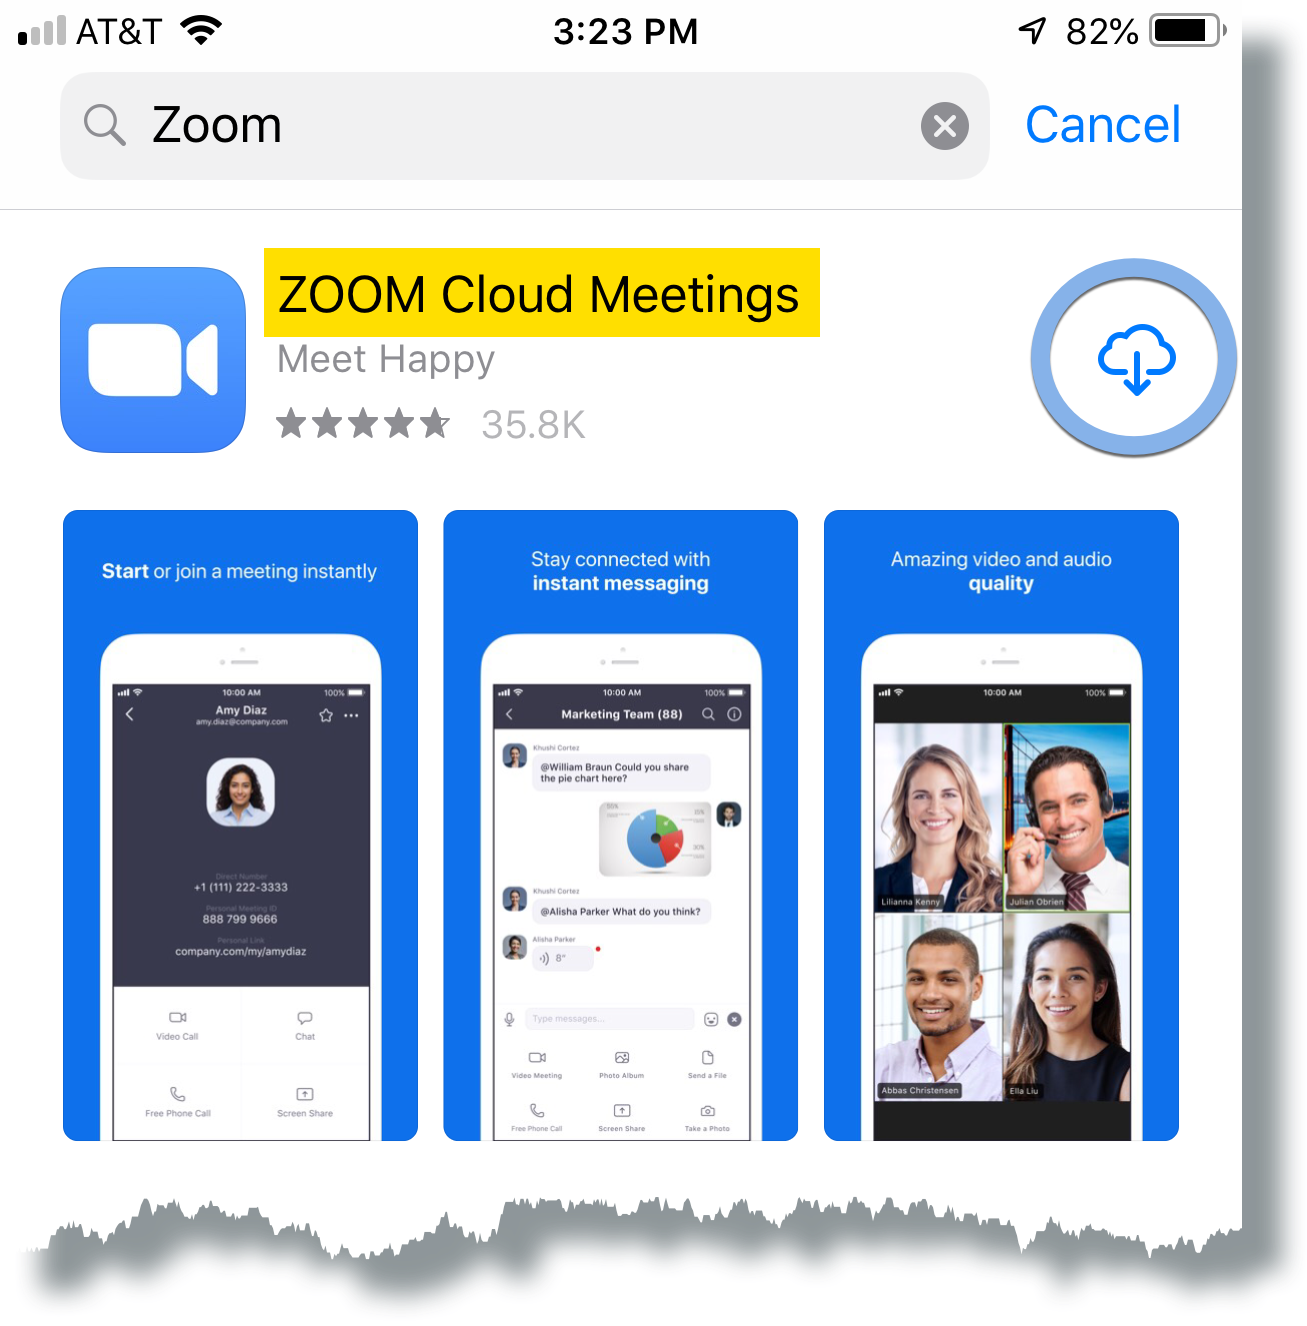
ZOOM Cloud Meetings is a great app for meeting with others. You will see this option amongst the list of apps that open up with ‘Zoom’ in their names. Choose from the available options and tap GET to get started!
Step # 5: Start the installation
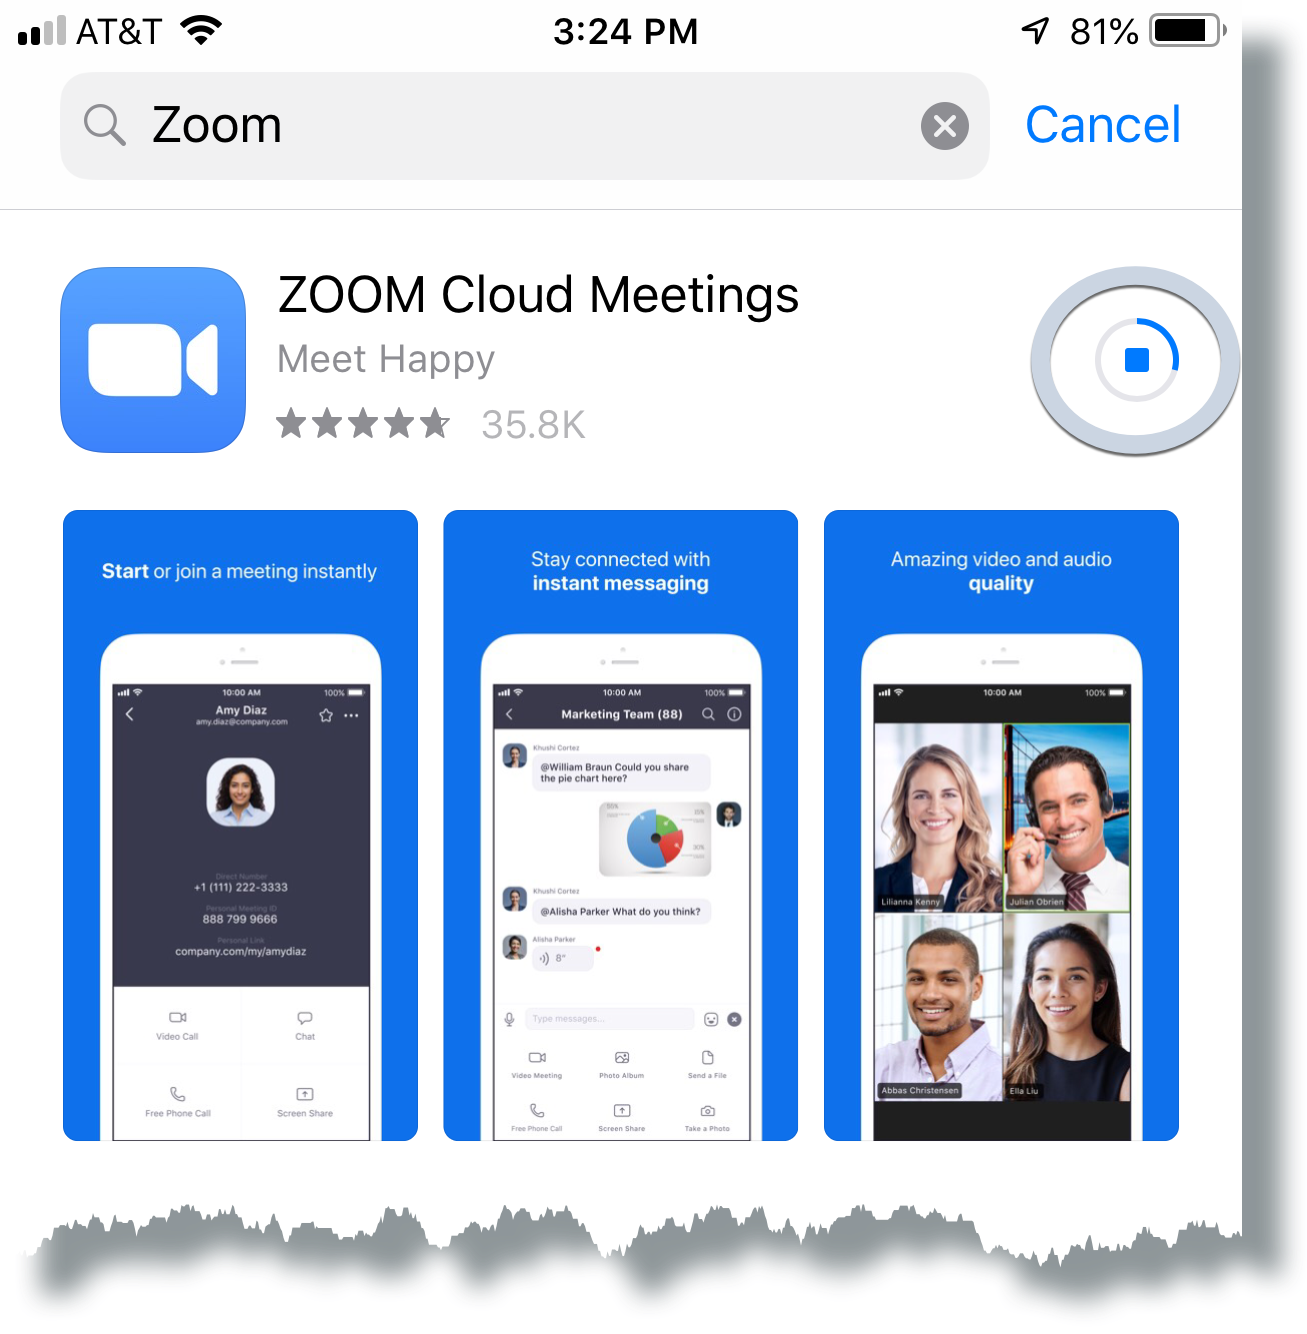
Next up, once you have selected your ZOOM Cloud Meetings, the next thing to do is to start the installation process. Clicking on GET will start the installation process and you will see a pop-up on your screen that says ‘INSTALL’. If you are using a Wi-Fi connection, then the app will install automatically. But if you are not using a Wi-Fi connection or if there is no internet connectivity, then the app will not install automatically and you will need to connect to the internet later on to finish installing the app.
Step # 6: Open Zoom
Once your installation is complete, you will be notified of the installation. Your status of the installation bar will also change to ‘OPEN‘. You can simply click on this open button to open up your installed Zoom app
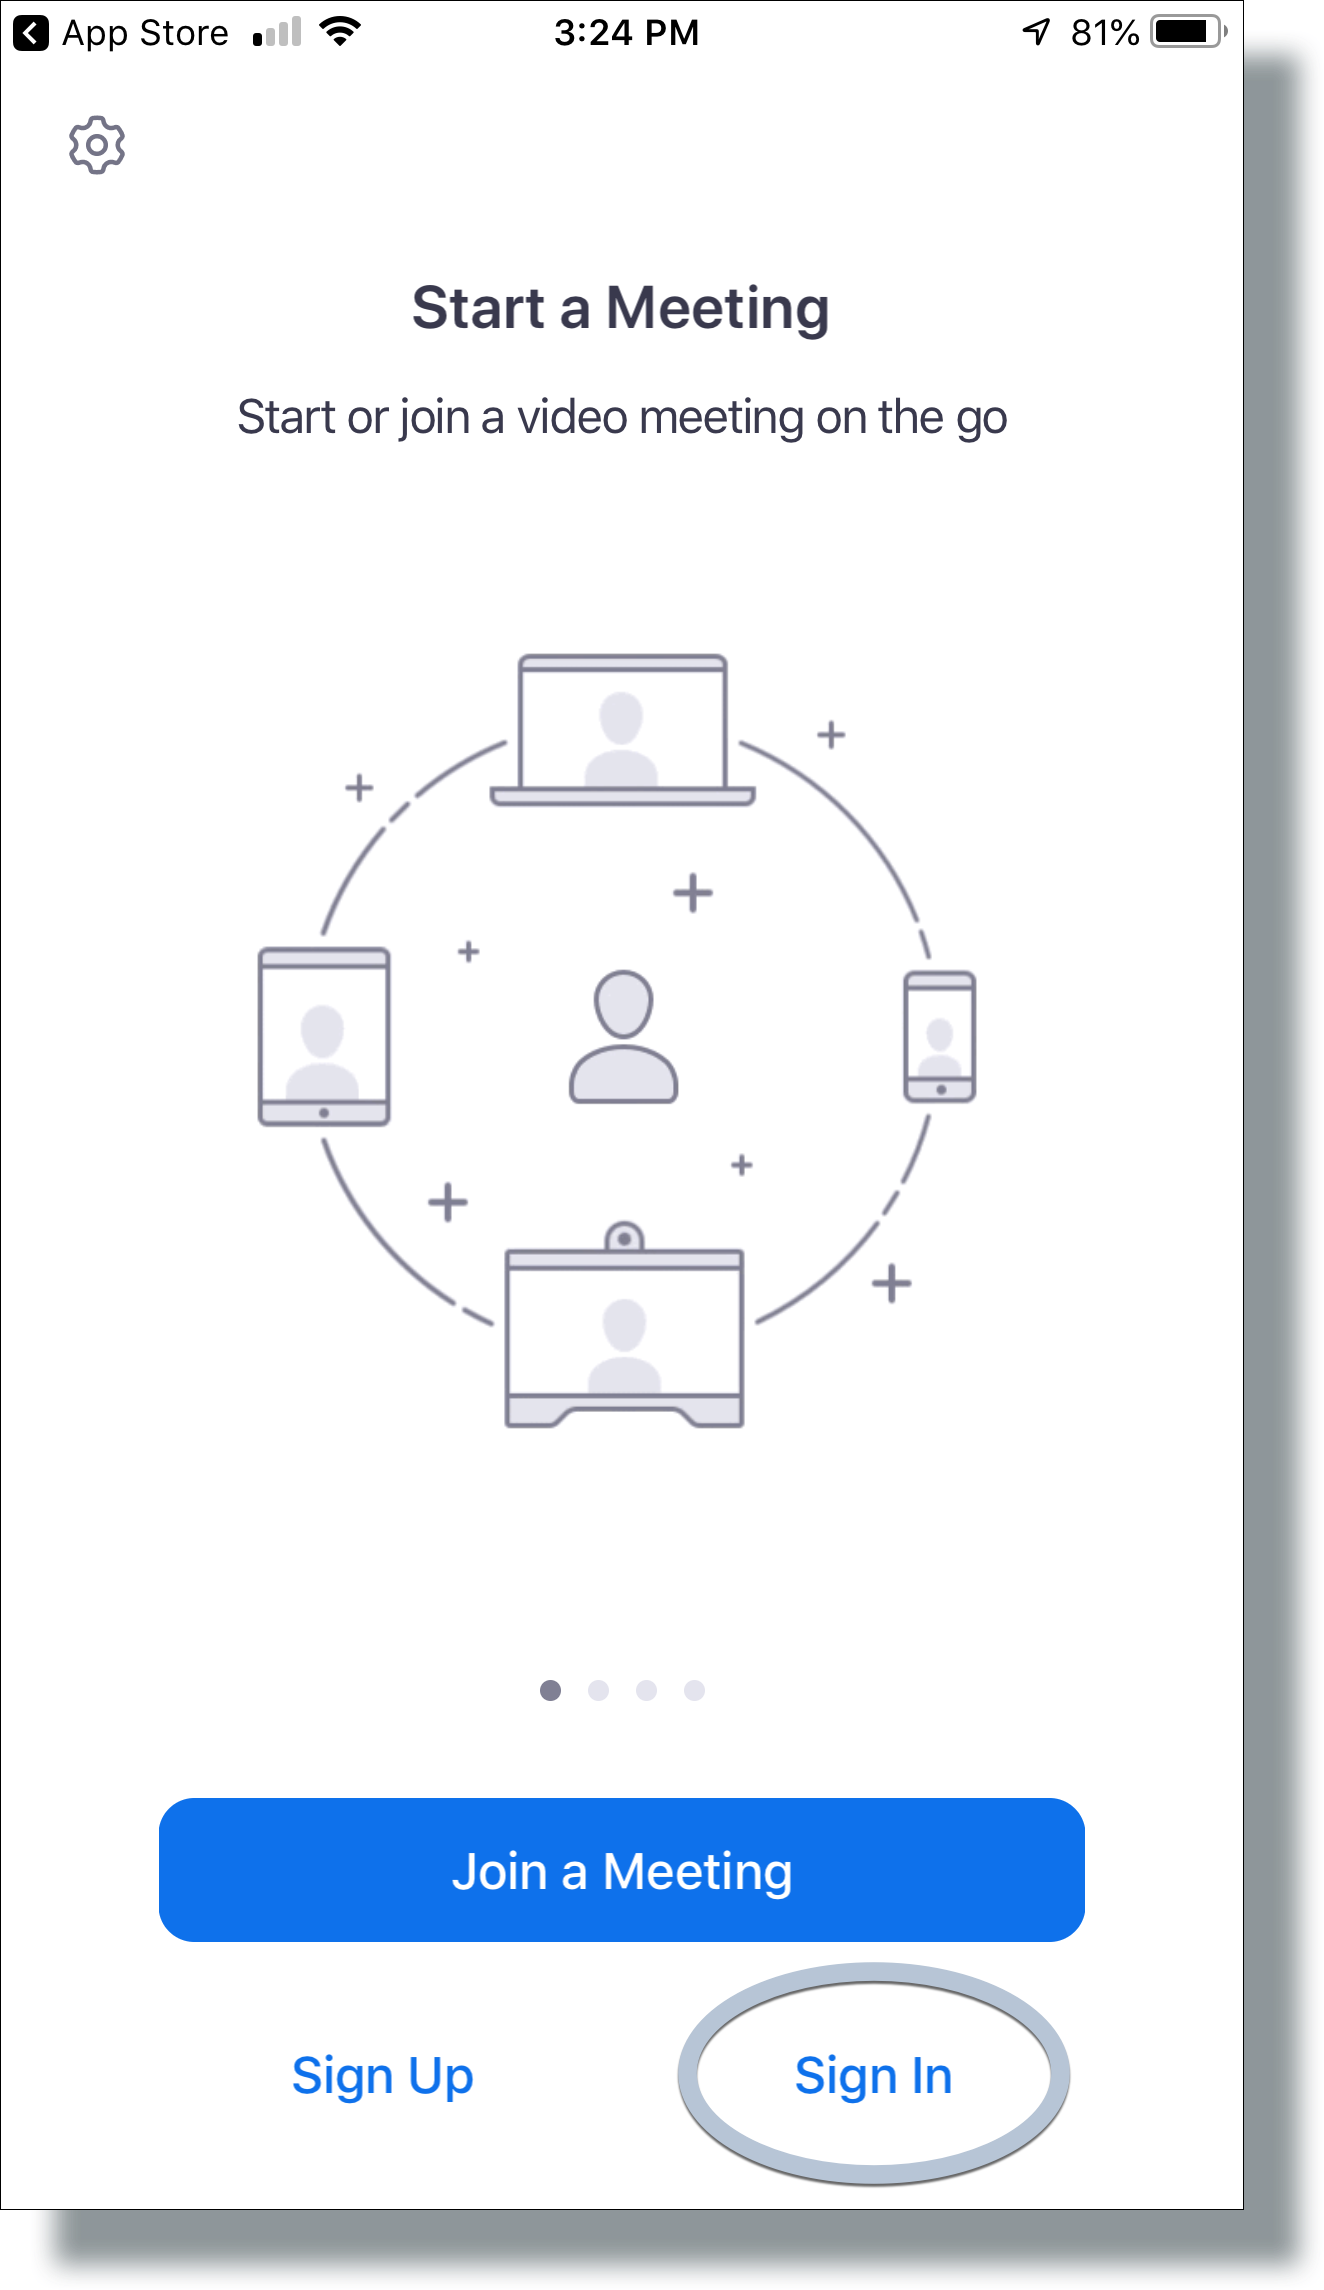
Step # 7: Sign in to Zoom
Once, you have installed the Zoom app on your iPhone, the next thing you need to do is sign into Zoom. To do this, open up the Zoom app and type in your email address and password. Once you are logged in, you can start using the app for all your virtual meeting needs!
How To Install Zoom App Through iTunes?
Now that we have covered downloading the Zoom app via the App Store, let’s move on to downloading the Zoom app through iTunes. This is particularly useful if you are using an iPad but you cannot download the app from App Store as it is not available on the iPad.
In this case, you will need to install Zoom through iTunes so follow the steps mentioned below:
Step # 1: Open iTunes
The first thing you need to do is open iTunes on your computer. If you are not aware of where iTunes is located, then it is at the top left corner of your screen and looks like a white music note with a green background. Click on it to open up the program.
Step # 2: Connect your iPad
Once you have opened up iTunes, the next thing you need to do is connect your iPad to your computer. To do this, plug in the lightning cable that came with your iPad into the charging port at the bottom of your iPad and plug the other end of the cable into the USB port on your computer.
Now, your iPad will show up as soon as you connect it to your computer and iTunes will automatically open up the app on its own. It may take a few seconds for iTunes to recognize that there is an iPad connected so be patient. If it takes longer than usual, then go ahead and close down the program and try again later.
Step # 3: Download Zoom App from iTunes
Now that your iPad is connected to your computer, the next thing you need to do is download the Zoom app from iTunes. In order to do this, click on the App Store icon on the top left corner of your screen and it will open up a list of all the apps that are available on iTunes. Scroll down until you see Zoom and then click on GET to start downloading the app.
Step # 4: Install the app
You will see a pop-up on your screen that says ‘INSTALL’. If you are using Wi-Fi, then the app will automatically install. But if you do not have any internet connectivity or it is an iPad and the App Store does not support iPads, then click on CANCEL to stop the installation process and try again later when you have internet connectivity.
Step # 5: Open up Zoom
Once the app is installed, click on OPEN to open up Zoom and start using it right away! This way of downloading the Zoom app is pretty simple and straightforward. You can simply then add in your credentials and get your Zoom app running on the iPad.
How To Join A Zoom Meeting On Your iPhone?
Now that we have installed the Zoom app on our iPhones, the next thing we need to learn is how to join a Zoom meeting. This can be done in a few simple steps and we will walk you through each one of them below:
Step # 1: Log into Zoom
Before anything else, make sure that you have the Zoom app installed on your iPhone and that it is running in the background. To do this, simply open up the Zoom app from your home screen and enter your email address and password to sign into Zoom.
Step # 2: Join a meeting room
Once you are logged into the program, decide whether or not you want to join a meeting that is already in session or if you want to schedule your own meeting. To join a meeting that is already in progress, click on the JOIN MEETING button and type in the Meeting ID number of the room that you want to enter.
Step # 3: Press Enter
Once you have typed in the Meeting ID of the room that you want to join, simply press ENTER on your keyboard. Zoom will automatically start searching for all rooms with this number and once it finds one, it will ask if there are any more participants who would like to join the meeting. If not, then click on YES but remember that just because you are in the meeting room, it doesn’t mean that everyone can see and hear you.
And that’s it! You will become a part of the Zoom meeting via your phone.
How To Launch A Zoom Meeting On Your iPhone?
Now that we have learned how to join a Zoom meeting, the next thing that you need to know is how to launch your own one. The process here isn’t all that complicated and it’s pretty much similar to joining a Zoom Meeting:
Step # 1: Create a new meeting room
The first step of launching a brand-new meeting is to create a new meeting room. To do this, click on the NEW button at the top of your screen and then select MEETING ROOM from the options that are given to you.
Step # 2: Enter in basic information
Once you have clicked on the MEETING ROOM, another box will pop up with all sorts of information that you need to enter. The first thing that we recommend is entering a name for your meeting room and then picking an appropriate description too (this will help the moderators of the Zoom meetings know what kind of rooms they are).
Step # 3: Set up additional options
Now, if there are any other settings or preferences that you would like to change, you can do that as well. For example, if there are any times when this room should be locked or unlocked then simply click on the LOCK/UNLOCK MEETING button and set it up however way you would prefer.
Step # 4: Set the time of the meeting
The last thing that we recommend changing is the time of your meeting. Zoom allows you to set up a time for the meeting but it is always best to double-check with everyone who has joined and make sure that they are available during this timeframe too.
Step # 5: Save the information
You can create as many rooms as possible, but keep in mind that those who want to join need the Meeting ID. If you’re giving a presentation, it’s helpful to have a private chat room for moderating the discussion with all of your participants.
When you’re done, tap SAVE and your new room will be created!
Step # 6: Launch the meeting
Now that everything is set up, it’s time to launch the meeting! Tap on JOIN MEETING and type in the Meeting ID that was given to you when you created the room. If there are any problems joining or if the room doesn’t exist, then please reach out to your event organizer for help.
How To Adjust Audio Of Zoom On iPhone?
Now that you have successfully joined the Zoom meeting, the next thing you need to decide is whether or not you want to join with audio. By default, your iPhone will join with audio but you have the ability to change this if you would like.
For this, you will first need to double-click on the home button of your iPhone. Once you have double-clicked on the home button, all of your open apps will show up on the bottom of your screen. Swipe left or right until you find the Zoom app and then tap on it to open up the app.
Once you are in the Zoom meeting, you will see a few different icons at the top of your screen. One of these is a three-dot menu and by tapping on it, you will be able to access all of the different options that you have.
If you would like to change any of your preferences or settings, then simply tap on SETTINGS (this will show up at the bottom of your iPhone screen). Once in Settings, make sure that Audio is set to ON if it isn’t already. This way everyone who has joined can hear what is going on.
You can also change the volume of your audio by tapping on the Volume slider and moving it to the left or right. If you want to mute your microphone, then simply tap on MUTE MICROPHONE and it will be turned off.
How To Turn On Camera On Zoom In iPhone?
Another feature which iPhone offers its users is that by default, your camera for the video will be turned off once you will join the meeting.
If you would like to turn on your video during the Zoom meeting, then simply go back to SETTINGS and tap ON VIDEO. This will allow all of your participants to see what is going on in real-time!
How To Send A Message In Zoom Chat On iPhone?
If you would like to send a message to one of your participants during the Zoom meeting, then you can do so by tapping on the CHAT icon. This will open up a chat window in which you can type any messages that you want and they will be seen by everyone who is in the meeting.
How To Add A Participant In Zoom Chat On iPhone?
If you would like to add a participant to the Zoom meeting, then you can do so by tapping on the + icon. This will allow you to type in the name of the person that you would like to add and they will automatically be added to the meeting!
How To Leave A Zoom Meeting On iPhone?
Leaving a Zoom meeting on your iPhone is very easy. All you need to do is tap the Leave Meeting button at the bottom of your screen and then type in LEAVE MEETING when prompted for it.
By doing this, the video will be turned off automatically once everyone leaves (this works great if you are having an impromptu meeting and you want to save your battery!).
Wrapping Up
Zoom is a great app that works brilliantly for having virtual meetings. Next time if you are faced with the task of hosting or attending a meeting, be sure to try Zoom! It’s easy to use and will make your life a lot easier. Zoom also works great for iPhone users and this article summed it all up!
So that’s it! We hope that this tutorial was helpful and you now know how to install Zoom on iPhone or iPad. You can now conduct your virtual meetings on your iPhone or even on your iPad. If you have any questions, then just leave a comment!
Eisha Gul is a part of Weshare’s writing team. She has social media marketing experience for over 4 years and has been writing in-depth guides and articles about the industry ever since.
We Also Reviewed
- 45+ Advertising Statistics That Will Blow Your Mind
- 33 CRM Statistics You Should Know
- 41+ Public Speaking Statistics You Should Know
- 35 Machine Learning Statistics You Should Know
- 34 Employee Burnout Statistics You Should Know
- 39+ Communication Statistics You Need To Know
- 37+ Cold Calling Statistics You Need To Know
- 21+ Entrepreneur Statistics You Should Know
- 35+ Contract Management Statistics You Should Know
- 37+ Zoom Statistics You Should Know
- 35+ Sales Training Statistics You Should Know About
- 75+ WordPress Statistics You Need to Know
- 41+ Startup Statistics You Need to Know
- 37+ Presentation Statistics You Need To Know
- 41+ Recruiting Statistics You Need to Know
- 23+ Apple Podcast Statistics You Should Know About
- 31+ Spotify Podcast Statistics You Should Know About
- 35+ Spotify Statistics You Should Know