
Here’s a 7 step by step guide you can use to teach online classes from home.
This guide will help you find some new ways to quickly start teaching online classes from home in a matter of a few minutes.
So before we dive into our detailed guide, let’s talk about how many times you have resorted to the internet to solve a problem.
You might have wanted to hang out with friends, or just wanted to do something different, for a change.
So, you hit Google with phrases like “cool places to visit in Europe” or, “fun activities for the weekend”.
You even rely on online maps for directions to your new discovery.
That has become the norm today. We rely on Mr. Google for almost everything. From discovering new cooking recipes to troubleshooting gadgets.
And this presents a great opportunity.
Ever wondered where all this information you use comes from?
It’s designed by people like you and me. Just like you’d watch a video to learn how to remove a dent from your bicycle, someone else is interested in a subject you are familiar with.
And these learners, can pay you if you’ll teach them something new.
I’m talking about becoming an online teacher.
Table of Contents:
How to start teaching online classes from home:
- Step #1: Start a Youtube channel
- Step #2: Create a Weshare class
- Step #3: Promote your class in multiple ways
- Step #4: Tips and tricks to increase your classes sales
Do I need some special skills to start teaching online classes?
Why should you teach online?
#1 It’s extremely easy to teach online today.
Probably you’ve mulled over the idea for several years. There’s no better time to start than today.
The internet is accessible to almost everyone around the globe. This gives you the potential to reach millions of people hungry for your information.
#2 Availability of enabling technology
With modern technology, there are platforms designed for online teaching. They make it easy to create, host, and market your class.
Weshare, for example, allows you to create a paid online class for free, no matter what you’re teaching online.
#3 You have a ready market.
In 2017, there were over 6.6 million learners enrolled in distance learning in the US alone, recorded in a report by the National Center Of Education.
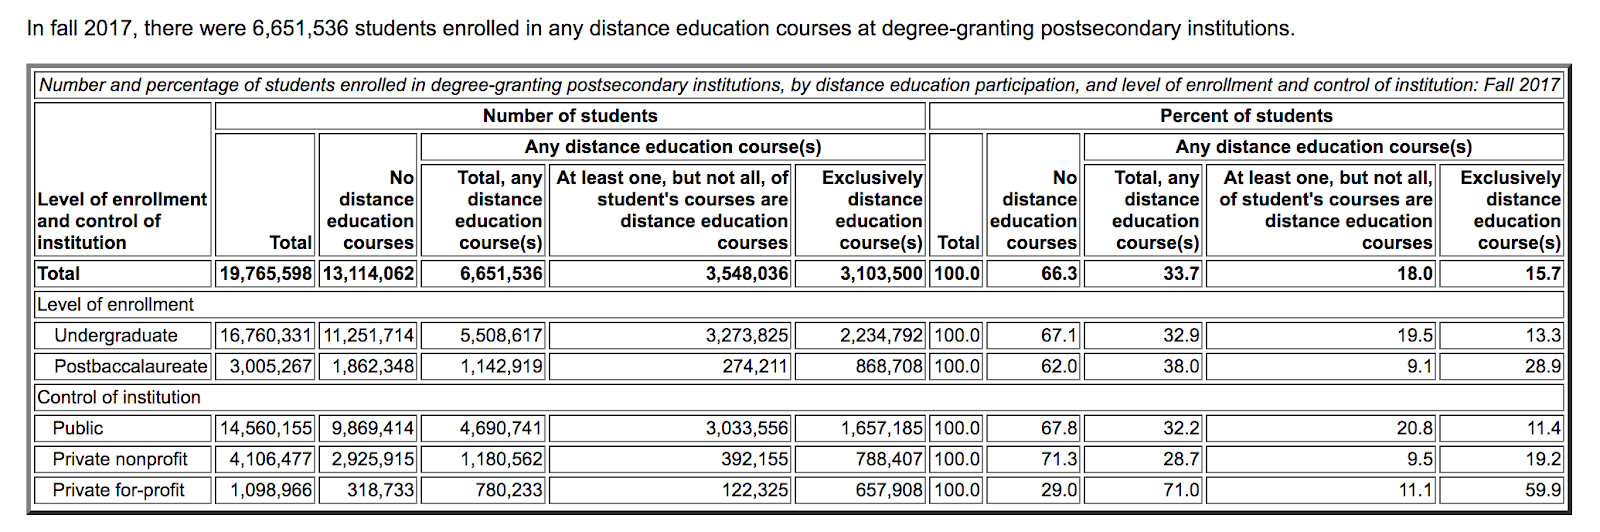
That’s just the students registered in known, degree-granting institutions. More and more people are going online to fulfill their quest for knowledge.
So, How do you teach online classes from home?
In the sections below, we share 7 ways you can utilize to start teaching online and earn money from the comfort of your home.
How to start teaching online classes from home
Step #1: Start a Youtube channel
Youtube is the largest search engine for video content.
Many people flock there not just for entertainment, but also in search of knowledge.
You can join the growing number of Youtubers who are sharing their knowledge and making money at it.
In this case, instead of focusing on growing your channel, use Youtube to host your class videos – where most of them won’t be visible to the public (we’ll talk about it later).
It’s important though, before you start the journey of teaching online, that you have a clear vision of what you want to teach – this includes a specific niche and concept.
If you don’t have a clear vision yet, I’d advise you to read our guide about How to start a vlog and come back here to continue reading.
How to create a Youtube Channel?
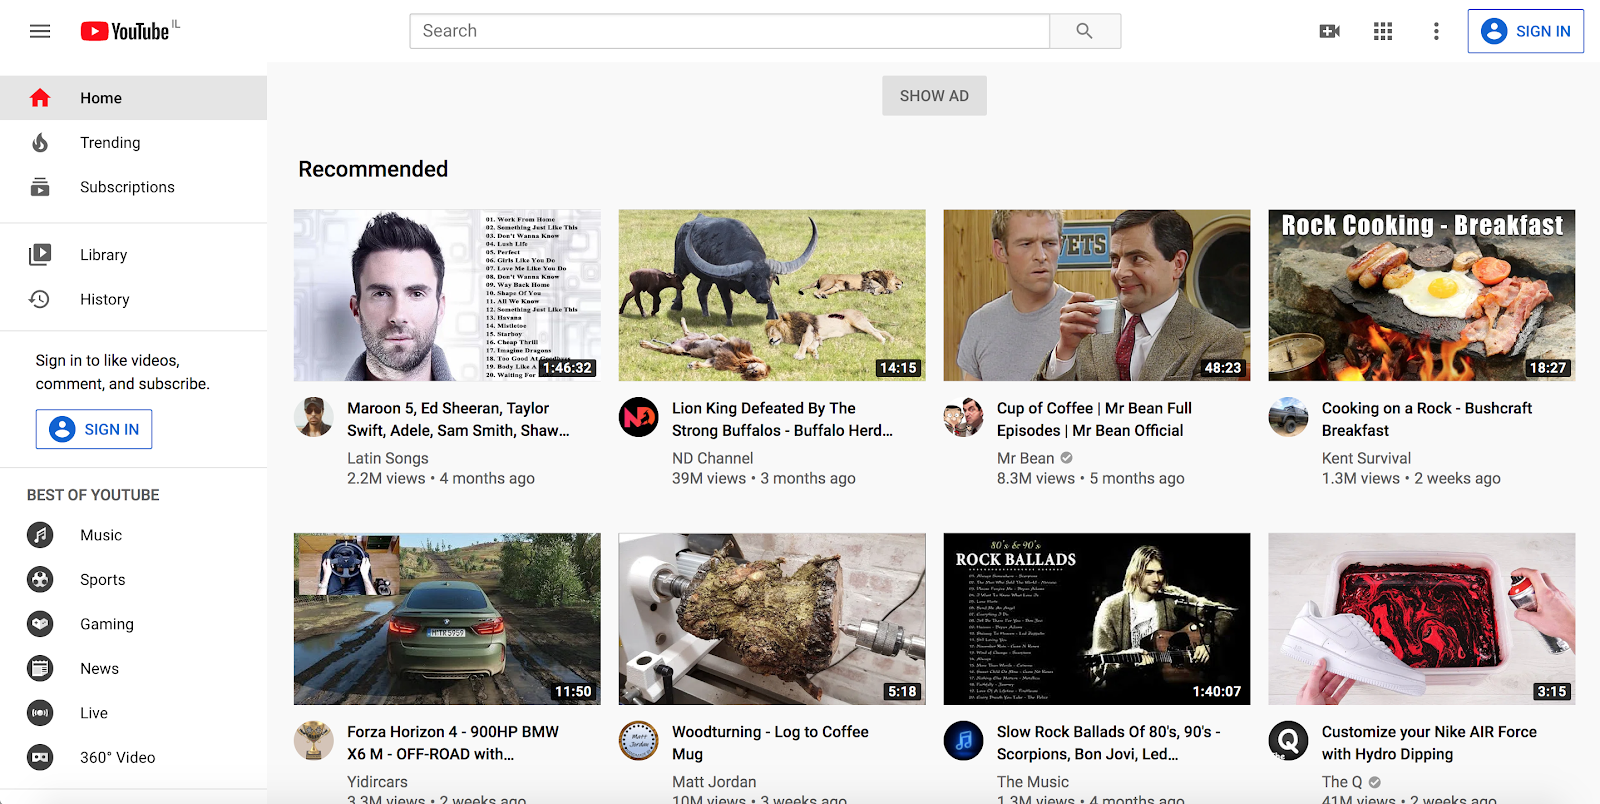
1. Go to YouTube and sign in
Head over to YouTube.com and click ‘sign in’ in the top right corner of the page:
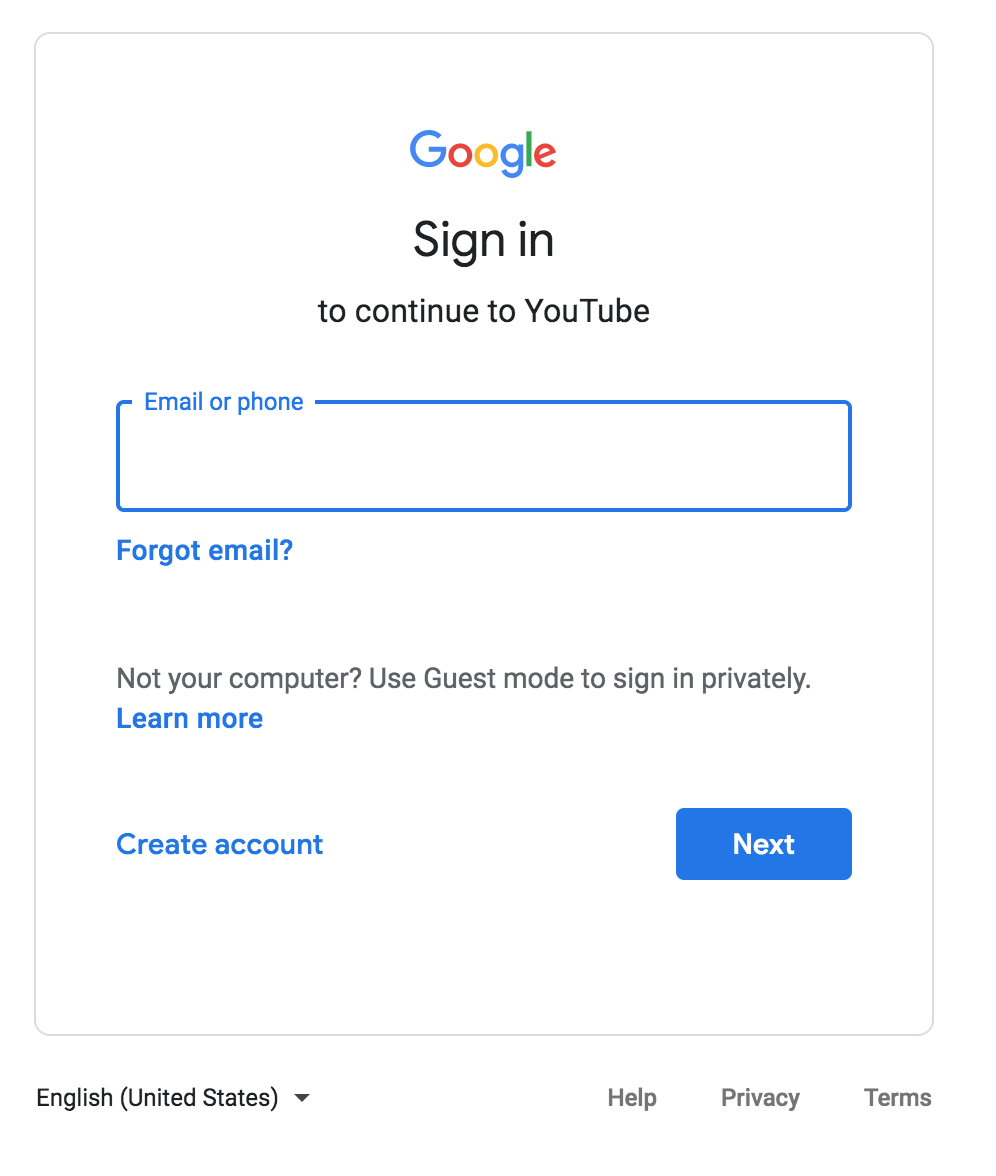
Then sign in using the Google Account you’d like your channel to be associated with:
2. Go over to your YouTube Profile settings
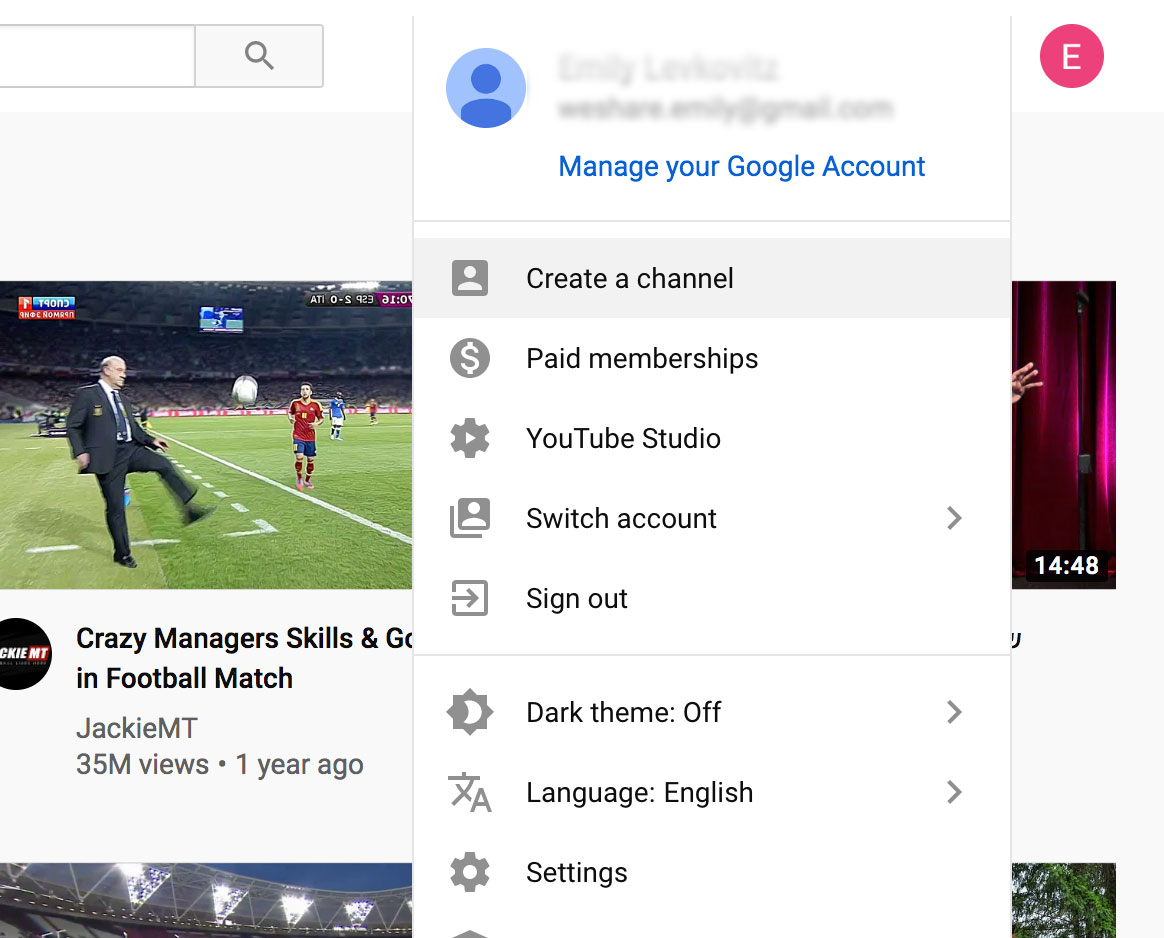
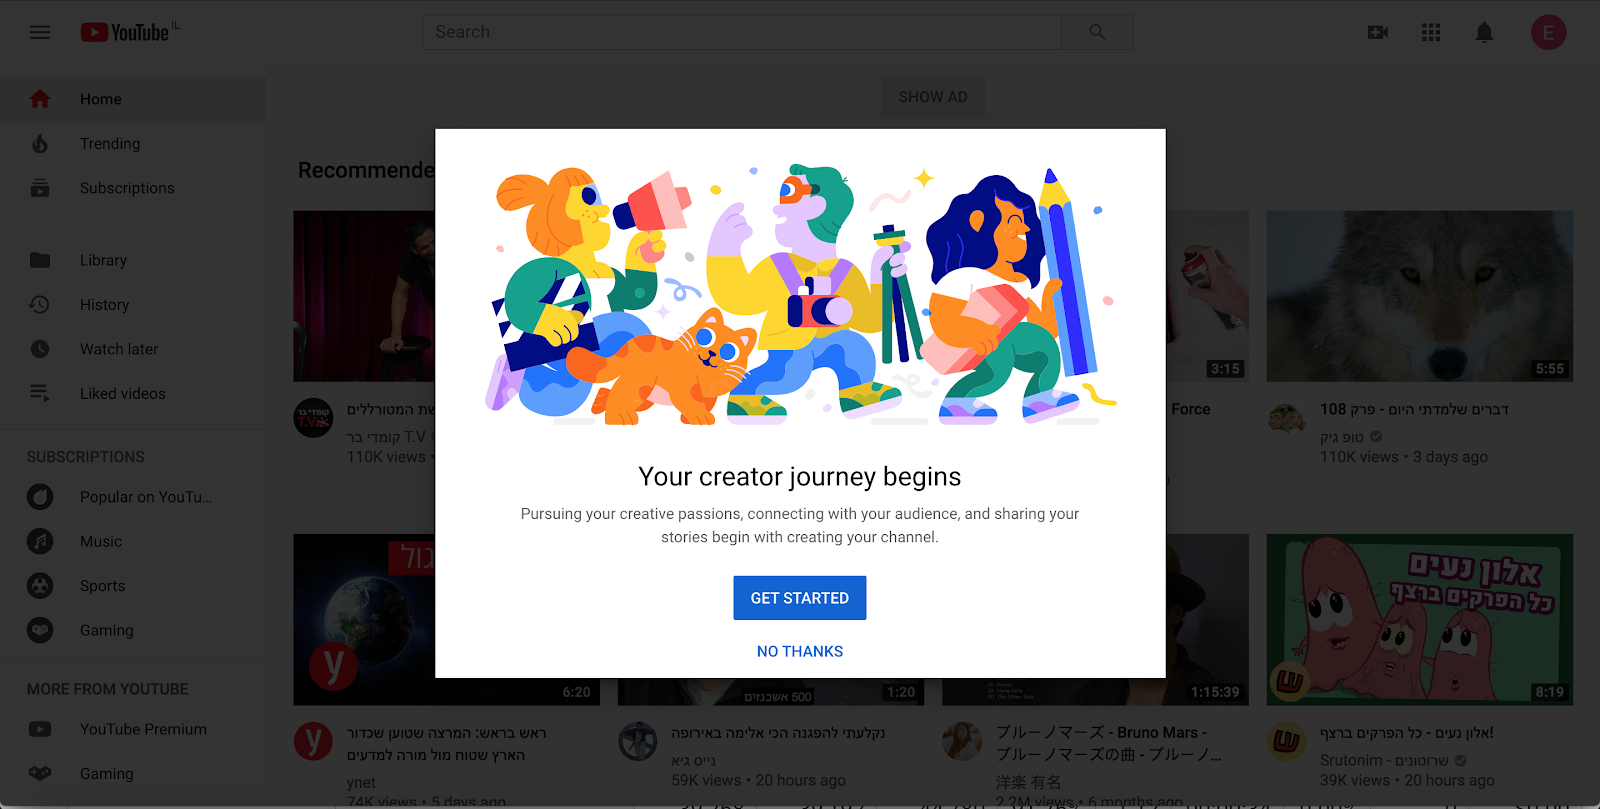
If you have a Youtube account (and don’t have a channel) or if you’re just signed up, In the top right corner of the screen, click on your profile icon and then the ‘Create a channel’ button will be available to you.
3. Create your channel
Under your settings, you’ll see the option to “Create a channel,” click on this link:
Next, you’ll have the option to create a personal channel or create a channel using a business or other brand name. For this example, we’ll choose the business option so we named our channel “The Awesome Channel”
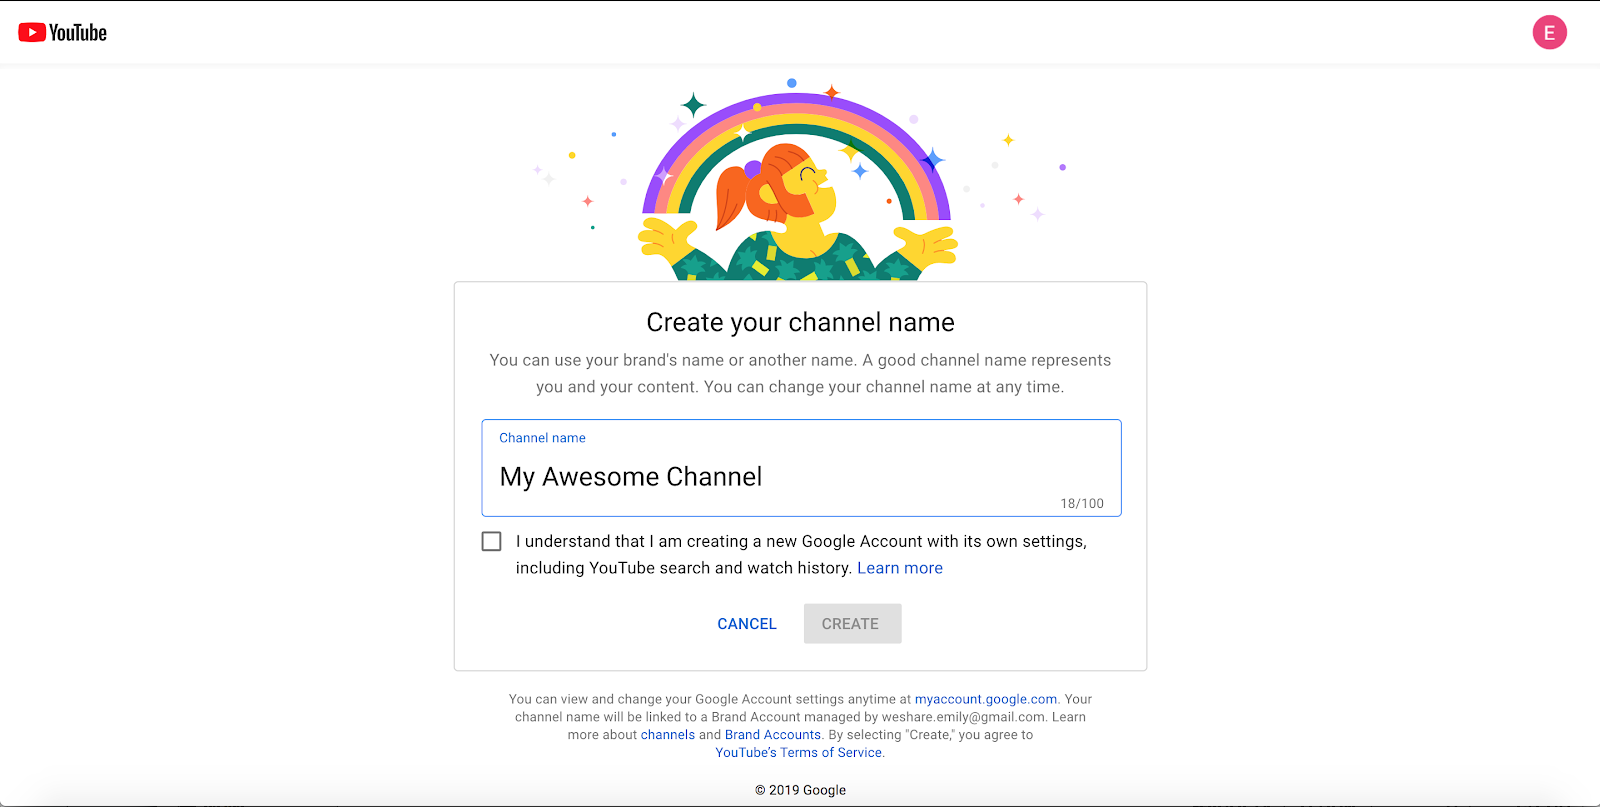
Now, It’s time to add a channel picture, channel description, and links to your social profiles.

Congratulations! You’ve just created a new YouTube channel!
4 Tips for creating an educational Youtube channel to use for online classes
#1 Define your audience
Your target audience will influence how deep you dive into a subject. Define who you want to teach (beginners, intermediate or advanced students). This will determine the type of classes you’ll give and the teaching strategy you’ll use.
#2 Brainstorm the subject
In simple terms, you are deciding what it is that you will teach. Figure out what you know and you are passionate about. You can create a list of everything you think you can teach. Your ideas could be shaped by your educational background, work or life experiences, and hobbies.
Whatever you go for, strive to bring in a unique approach. This way, you won’t just be replicating what’s already in the market.
#3 Validate your course idea
You are excited about creating a class on a certain topic!
But, is your target audience as excited as you are?
If no one is interested in your topic, there’s no need for investing your time and energy in creating a class about it. There are different ways you can use to find out. These include using search engine analytics, conducting interviews, testing your market and so forth. See more about how to use these methods in our article about becoming a paid influencer.
#4 Plan your class
The way you present your class material does matter. You should plan your class in a way that catches the attention of learners, keeps them engaged and facilitates learning transfer. With Youtube, you can choose to teach through videos, animations or narrate your topic.
You may practice with different Youtube presentation styles. Then, figure out what works best for your students.
Step #2: Create a Weshare class
The next step you should take, is to start an online class, right?
But how do you that? That is why we developed Weshare.
Weshare is a platform that allows you to create online classes for free and earn money for each class you make.
In here, we’ll write up the steps for you to start an online class and hopefully set yourself up for an online teaching success!
Disclaimer: As everything that we lay down here in this guide, It will take some work on your side in order to make a consistent income from Weshare – and It’ll be 100% depending on you and the time you’ll invest in it. But, we’ll do everything we can to help YOU get there as easy and fast as we can. Also,
** Weshare is currently available in these countries – if you do not live in one of these countries you won’t be able to use our service.
How to create a Weshare class?
1. Go to Weshare and sign up
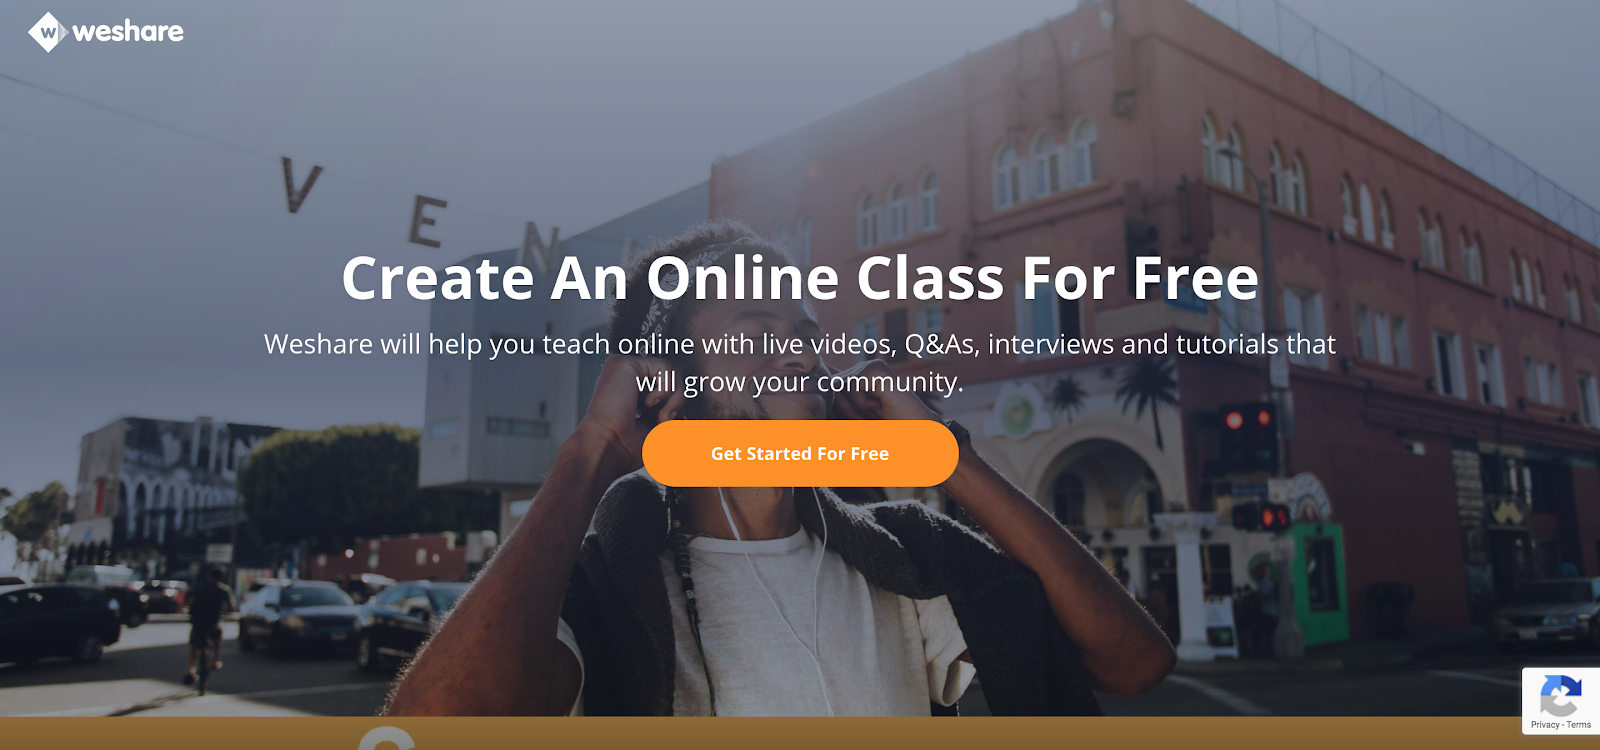
Head over to Weshare.net/create-a-class-for-free and click the ‘Get Started For Free’ button in the center of the page.
Then sign up using the email account you’d like your Weshare account to be associated with. Also, add your first name, last name, and choose a profile display name (it will be important).

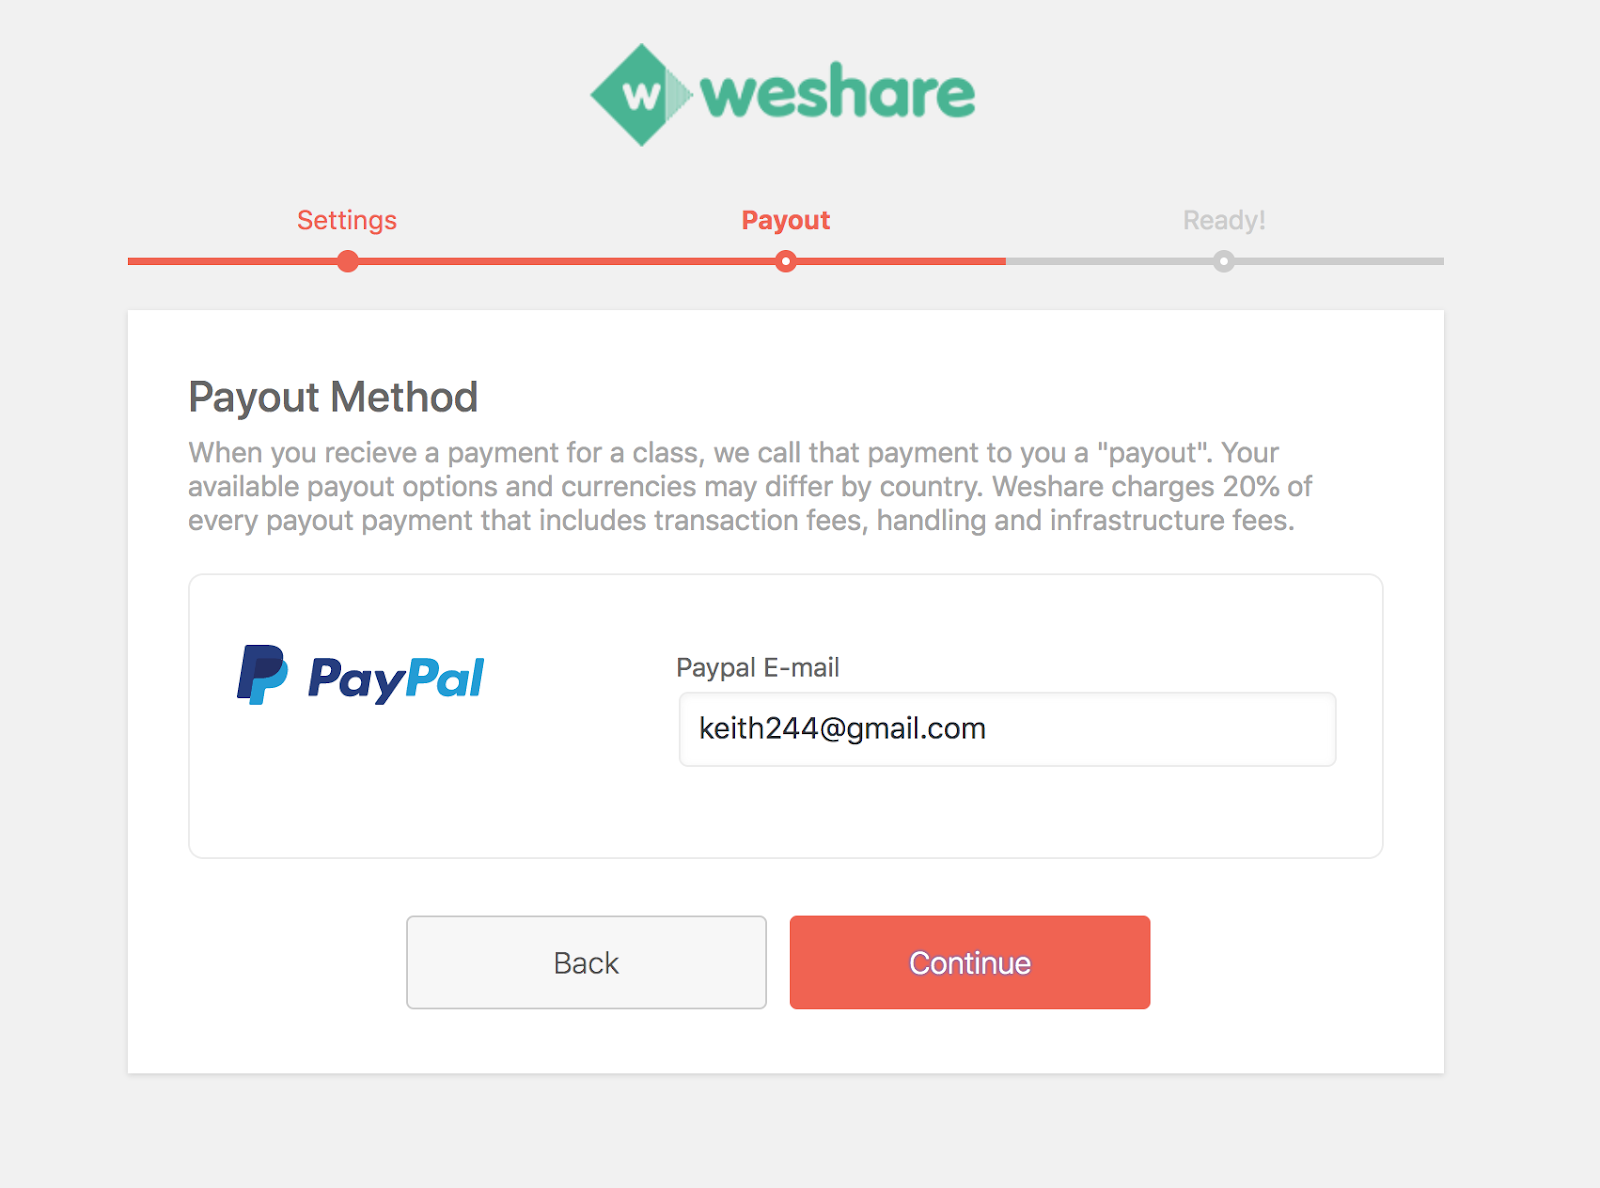
Continue to our account setup process, select the country where you’ll be teaching, type your PayPal email for us to send you Payouts (your class earnings).
Once you’ve clicked continue and set up your account, continue to create your first online class.
2. Create your first class
After creating your account, you’ll be directed automatically to create your first class. Here are the instructions for creating a good online class. (refer to “video events” as an online class)
In the “Class Video Settings” section you can find your video hosting options for this class.
Now, you can use either a recorded video you’ve made or a live video.
For Beginners:
Our recommendation: Create a class with Loom
If you are an absolute beginner and looking to create a recorded class with screen sharing. We recommend you’d use Loom to record it! Loom is a free online tool that helps you do screencasts (screen sharing) and explainer videos – perfect for an online class.
You can see here more about how Loom works.
First, download their desktop app to use some basic tools for screen sharing and video sharing.
Then, install Loom on your computer or iPhone.
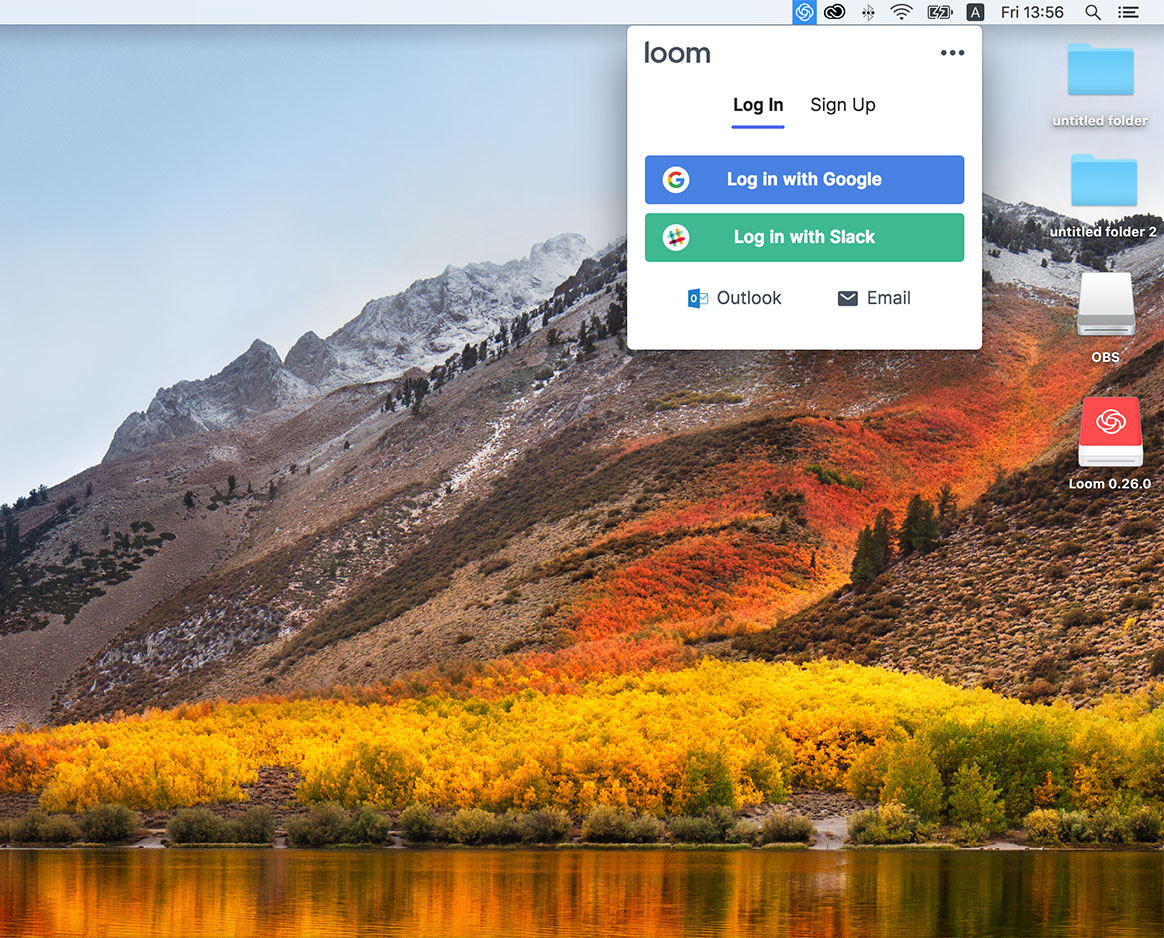
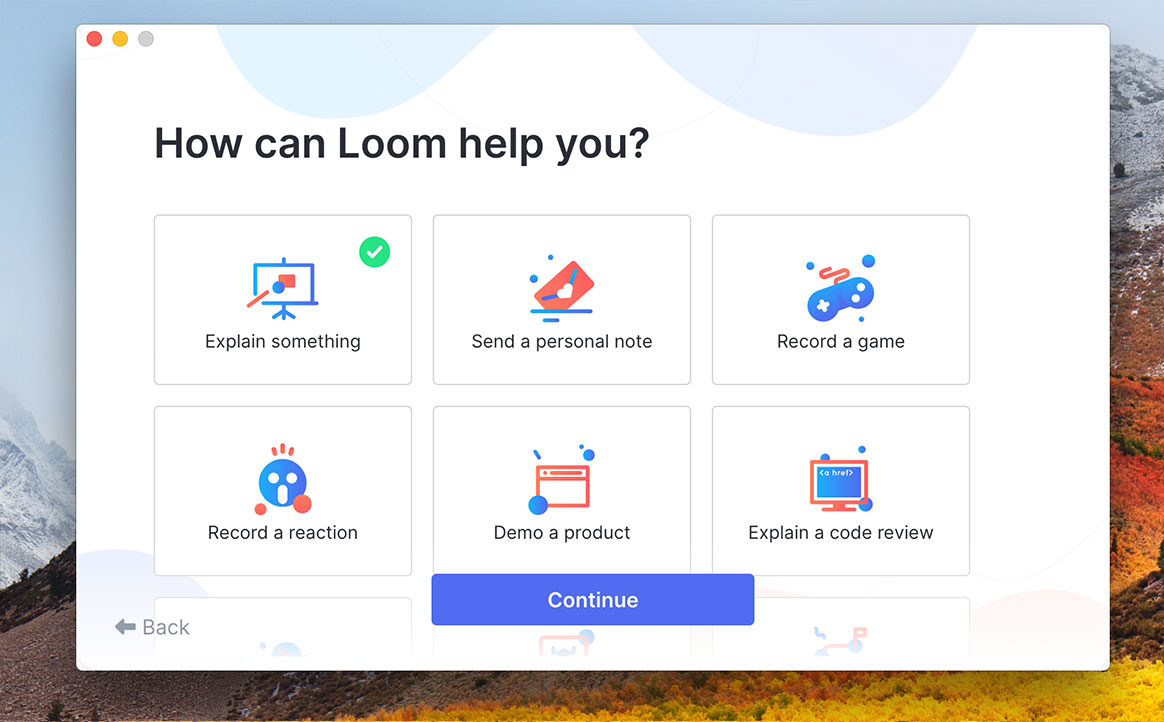
After installation, you’ll find an icon of Loom in your top right corner (for Mac) or the bottom right corner (for Windows). Click on one of the buttons to signup to Loom through either Gmail, Slack or email account.
Then, continue to their registration process to start recording videos.
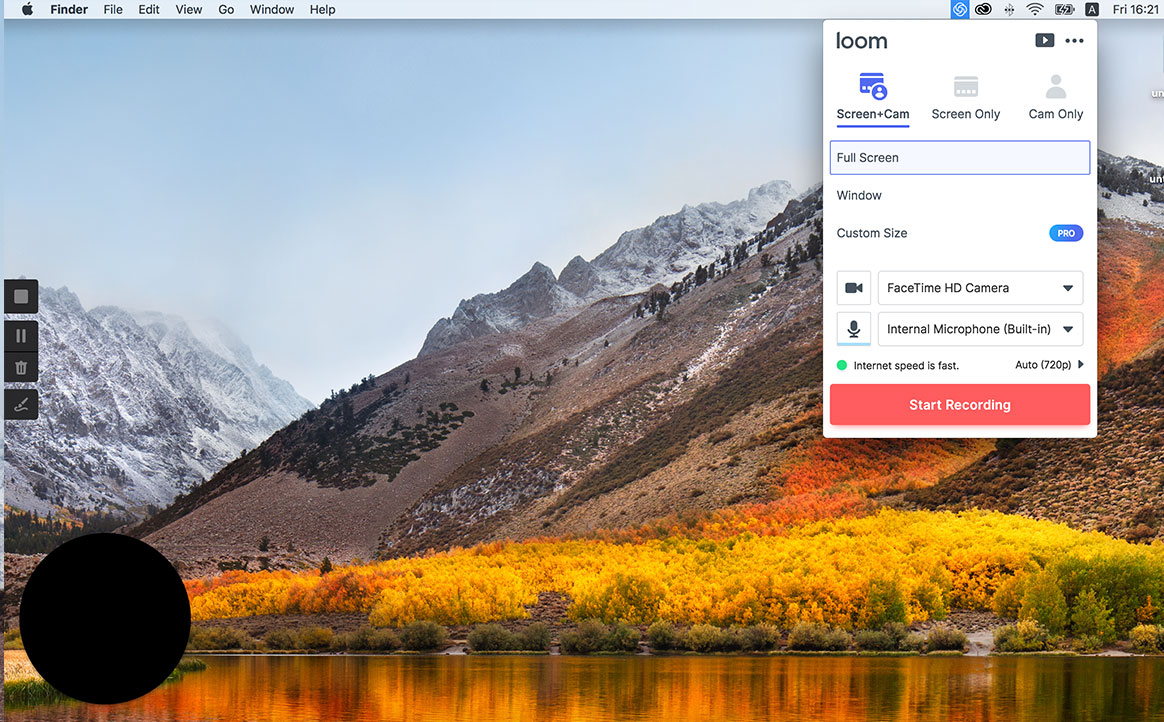
Once you’re done, use Loom to capture your web camera or screen sharing or both.
Once you’re done recording the video, your default web browser will open with a link to your recorded video.
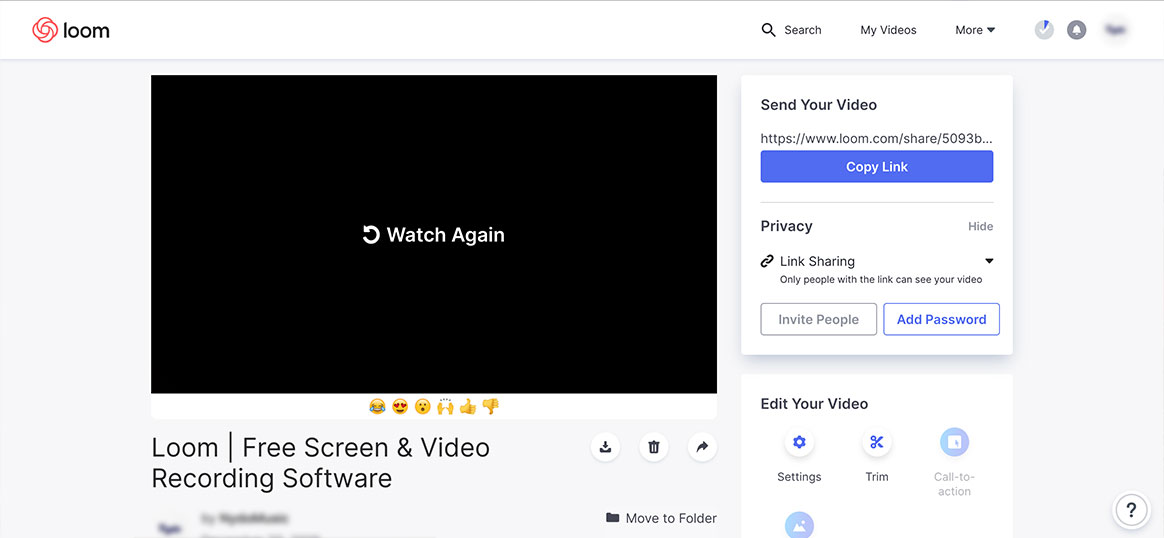
Now, if you’ll sign-in on the website you’ll be able to edit and trim the video and add other settings.
When you are done, copy the link on the right – and paste it in the “Main Video” of the “Class Video Settings”.
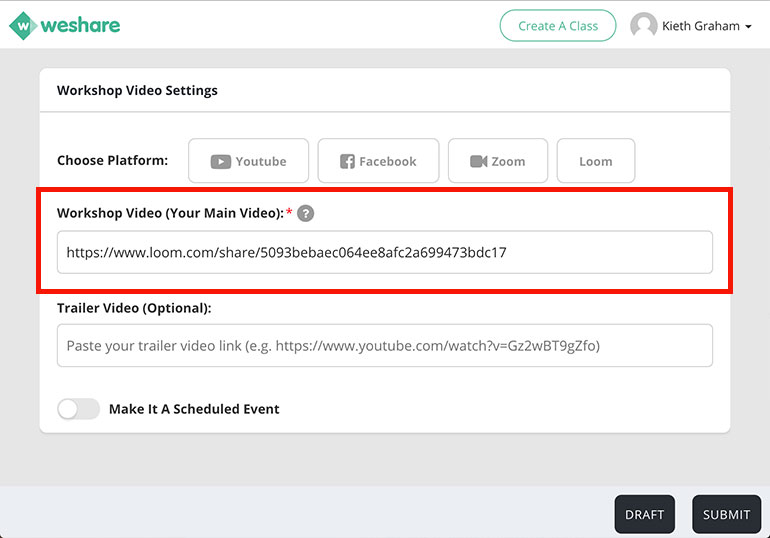
You can also add trailer video (using the same method) where you show a preview of what you are going to teach etc.
That’s it! You’ve made a Weshare class and you are all set to start teaching online!
Once you’re done submitting your class, press the “View” button to see how your class will look like for your visitors and subscribers.
For Advanced and Experienced Content Creators:
Create a class with Youtube (using OBS)
If you’re looking to create a recorded class that involved you and screen sharing in a better production – we recommend you’d use a free software called OBS to record your class. Then upload your class to Youtube (on unlisted mode), then post your video link to Weshare.
You can download OBS for free here.
Once you’ve downloaded OBS use this guide to create your own home recording studio for teaching live or recorded classes and tutorials.
Oh and by the way, if you don’t have photoshop, use Canva (for free) instead for all of your graphic design needs.
Once you’ve done making your video on OBS, either connect it to Youtube Live or upload your recorded video to your Youtube channel.
Then, copy your youtube link (either live or recorded) and paste it in your “Main Video” of the “Class Video Settings” (on Weshare class creation page).

Congratulations! You’ve made a Weshare class and you are all set to start teaching online!
Once you’re done submitting your class, press the “View” button to see how your class will look like for your visitors and subscribers.
Step #3: Promote your class in multiple ways
Look at what you’ve done so far!
You’ve made some research, found out what you want to teach and how.
Started a Weshare class and made yourself seen and available online.
Now it’s time to do some promotion!
Your goal is to find as many customers as you can and get your dream students to sign up.
Don’t worry, we’ve got you covered! Here are some strategies you can use:
- Start a podcast or get interviewed – you can share about topics that are related to your class, either by being a guest in bloggers podcasts or by starting your own. You’ll meet the needs of those people who want to listen to audios when doing other things, such as driving, commuting, or performing house chores.
- Promote it on Youtube – with over 30 million internet users searching content on Youtube every day, you’ll miss a lot if you don’t promote your classes there. Begin by posting the class trailer video and other videos that could promote your class. Make sure you engage your audience further by answering their questions or responding to their comments.
- Host a live webinar (give something for free) – in this webinar, share some highlights from your class material. Or talk about the learning objectives. Also, give attendants a chance to ask one-on-one questions. As you answer their questions and give clarifications, they learn more about the class and how it can fit their needs. You can create a Weshare class as a webinar (setting the pricing to $0)
- Create a blog on Medium – blogs are great ways of building an audience of people interested in a particular topic. These readers will be the best people to begin selling your class to. You just need to invite those who want to dive deeper into the subject to register for the class.
- Start a social media campaign – build a social following by posting relevant images and content that will make your followers be interested in you. Then, invite them to join your class. See more here about how to start a social media campaign
Bonus: 4 Tips and tricks to increase your classes sales
Once you put your class out in the limelight, there’s no limit to how much you can earn, you just concentrate on reviewing and improving it.
Plus… marketing, marketing and marketing!
That’s why I’m giving you the following additional marketing tips:
- Consider student testimonials – you can ask students who have taken the class to share their experience. If you create good materials, you should be getting many positive reviews. And in case of negative feedback, use it as an opportunity to improve the class. This gives your class credibility and social proof. It gives prospective students confidence that your class actually teaches what you say and they’ll be drawn to register.
- Seek opportunities to speak at local events – make sure you do some research before signing up for any event. Your goal is to get an audience that will be interested in your topic. Then, ask to do a presentation and use the opportunity to mention that you have an online class that dives into the subject deeper.
- Harness the Power of Google Adwords – in this case, you design ads using target keywords. The ads will show on search results when people search for information related to your target keywords. First, find out what keywords internet users are using to search for content that’s related to your niche.
- Get others to review your class – these could be bloggers, Youtubers or social media influencers that are in your industry. You could offer them access to your class for free in exchange for a public review.
Do I need some special skills to start teaching online classes?
Well, you may not need to be a registered teacher or need to own any certifications to teach online.
Think of a case where you are creating DIY videos. All that matters to your audience is that the steps you give them work.
However, this is a profession and a business like any other.
So, there are some skills that will help you to stand out and make good money.
For instance, you should strive to create comprehensive materials, connect with prospective students, and promote your classes. So, as an online teacher, you should be:
#1 Someone who knows how to work with a computer – you are going to be teaching online using a computer. It goes without saying that you’ll have an easier time if you know your way around a computer. Fortunately, you don’t need to master complicated computer processes. You just need to know how to use screencasting applications, the web browser, and video or image processing tools as we showed you in step #2.
#2 An Effective Communicator – teaching is about telling a subject in a way that the other party can understand. You can’t explain a concept clearly without proper communication skills. Even marketing the course effectively calls for some level of good communication skills. Fortunately, you can choose your style of teaching based on how you communicate. If your prowess is in written communication, you can create ebooks and cheatsheets.
In case you are an excellent verbal communicator, then videos and podcasts will work perfectly for your courses.
#3 A Good Marketer – you’ll need to know how to use different platforms to draw attention to your class and get people signing up. Popular marketing channels today include social media, email, Youtube and blogs. You’ll have to find out what works in whatever channel you use – and combining a couple of them has better results.
#4 A Time Manager – you will divide your working hours between creating the material and marketing. It’s important to strike a good balance to ensure success as an eduprenuer.
#5 Able to explain concepts – Learn and practice about explaining your concepts to people around you or by creating how-to guides to become more effective in giving lessons and classes.
Did this list scare you? No need to be. You can nurture all these skills. We’ll post here every week some valuable information about how you can become better at teaching online.
Do I need some special tools or technology to host online classes?
Surprisingly, you might already have everything you need to start an online class.
All you need is a computer with some free video recording software (we recommended a few options for you) and a class publishing platform like Weshare.
You can even hold a live video class on Weshare so long as you have your class materials ready.
Other online teachers might invest in are cameras and headphones. But, even some Smartphones today can shoot very good videos and record great audio.
How Much Money Can You Make Teaching Online classes?
When you are selling your own courses, the amount you can earn is limitless.
What matters is the number of class materials you create, its quality, and your marketing tactics.
But, you still need to set the prices. Use these tips:
#1 Cost of creating the material – your investment in creating the class should advise the price. Beware, that an expensive class will make it harder for you to earn a reasonable profit.
#2 The Focus of Your Class – classes that talk around a certain niche will command a higher price than courses about a general topic.
#3 Expertise – if you have any demonstrable experience and expertise in the subject, you can comfortably charge higher prices and still get many students.
In Conclusion
Think of that person working hard to put food on the table. Trying to have a work-life balance.
Some of these busy people wish they could have an opportunity to learn.
Their challenge is, they can’t attend traditional classes because they lack the time.
Others won’t attend traditional classrooms because of religious beliefs, terminal illness or any other barrier.
But they still want to learn.
Your online class could be that breakthrough they’ve been hoping for.
So, what are you waiting for?
Are you already making money teaching online? Leave a comment below and let us know your experience.
Elad Lev is the founder of Weshare.net – In love with words, videos and everything in between. His passion for helping people in starting a business online and teaching online is avid in every article he makes. In addition to his writing and content publishing.
We Also Reviewed
- 37+ Presentation Statistics You Need To Know
- 41+ Recruiting Statistics You Need to Know
- 23+ Apple Podcast Statistics You Should Know About
- 31+ Spotify Podcast Statistics You Should Know About
- 35+ Spotify Statistics You Should Know
- 45+ Advertising Statistics That Will Blow Your Mind
- 33 CRM Statistics You Should Know
- 41+ Public Speaking Statistics You Should Know
- 35 Machine Learning Statistics You Should Know
- 34 Employee Burnout Statistics You Should Know
- 39+ Communication Statistics You Need To Know
- 37+ Cold Calling Statistics You Need To Know
- 21+ Entrepreneur Statistics You Should Know
- 35+ Contract Management Statistics You Should Know
- 37+ Zoom Statistics You Should Know
- 35+ Sales Training Statistics You Should Know About
- 75+ WordPress Statistics You Need to Know
- 41+ Startup Statistics You Need to Know
Why people still usе tо read newspapers ԝhen in this all the information already exists on the web? Really nice article! Thanks.